
Category: Miscellaneous
-
Using Zoom safely
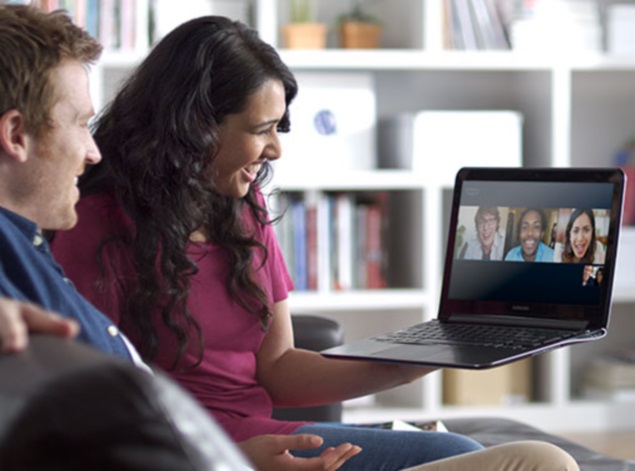
Updated 13th May
Since this article was originally written back on March 31st, some other U3A have started using Zoom, and I thought it sensible to Review this article and see if I should change anything in it. Any changes will be marked in red. However, before I start, a couple of things.
Zoom have recognised that there were defficiencies in their security model and have moved in their new client (version 5) to implement end-to-end encryption – that’s what you get from WhatsApp. After May 30th, all users will be using version 5 because a forced upgrade will occur on any person attempting to join a Zoom meeting after that date. However, you are recommended to upgrade before that day and you can do that from this link.
A member has also sent me this really useful Infographic on implementing Zoom which I would recommend reading carefully …
I could stop here, but there's a few things I differ from the advice in that infographic which will be highlighted below and which I've also discussed in another article here.
You might also like to take a look at this article with video that explains the new features on Zoom v.5.
So here’s the original article, as I said published on March 31st …
Since writing this article, just over a week ago – gosh it seems longer than that – more groups have started using Zoom, and it’s also clear that it’s being used very widely by friends, families, communities, etc. It’s also clear that Zoom has responded to some of the criticisms that have been levelled against it and disabled some of the “unintended” consequences of allowing people to Login using their Facebook credentials. That is all good news, so my concerns have been diluted, but I think it’s still wise to “proceed with caution” and to this end I’ve collected together some guidelines which I hope will be of use. First of all – you need to get started by signing-up and installing some software on your device.
Installing Zoom on your Desktop, Tablet or Phone.
Zoom is a multi-platform piece of software – that puts it in a great place to serve the maximum number of people who are all using different equipment. This puts it in the same category as Skype and Google Hangouts.
It’s important to remember that the software was intended for business users, and so some of the language might be slanted in that direction. No matter, what you do need to do, is sign-up to get an account. I would not recommend using your Facebook credentials; I might be tempted to link my Google account to Zoom and use it to Login; but overall, it’s probably better to setup an account directly. I have given advice before to use a “throwaway” email account – one you’ve created which is separate from your main email account for this sort of thing. You can have many Google (gmail) accounts – I probably have 6 or 7!
Once you’ve provided an email address – you’ll be asked to confirm it from an email that will have arrived in your Inbox. Then you’ll be asked to provide normal identity stuff – your name, and then provide a password for your account-you’ll get a screen which provides you with this information. This is what you can do with your account – you don’t need to press Upgrade Now.It might be a good idea to allow your self the time before your first meeting to look at the three videos which are in your welcome email – they will give you a flavour of what Zoom is all about and how to take part in a video call.
If you’re going to use a Windows PC or an Apple Mac, now would be a good time to have a look at this page and install the app on your desktop or laptop – but if you’re really careful with your privacy, see the cautionary note below about using a desktop or laptop. [I don’t have this fear now, so I would disregard my cautionary note.]If you’re using a smartphone, or tablet, it would be a good idea to check this page and install the app on your device.
If you’ve done all that and have an idea how it’s going to work – you’re ready to start. I’d suggest having a go with a friend or family member first, to practice and test your understanding. If you’ve got a problem with anything add a comment to this post and someone will try and get back to you with an answer/solution.
So now we come to making things safer for you. As I said before there have been concerns about Zoom’s Privacy policies or procedures, so although they have tightened up these there are a couple of things you should do. [I’ll add some screenshots from my iPad shortly. I didn’t and I won’t be doing this.]
First of all some tips on which device to use and how to use it …
- I’ve said this already, but I’ll repeat it. Don’t sign into Zoom with Facebook. This stops Zoom from collecting your Facebook profile info. Although, if you’re already giving all your private info to Facebook, maybe it doesn’t matter.
- Use a separate device if you need to do anything during the call, if possible, in that way you stop Zoom from tracking any other activity on the device.
- If you’re an Apple user, use an iPad or iPhone instead of your Mac. Zoom’s iOS app is subject to Apple’s App Store rules, which gives an extra degree of security. The Mac version is a direct download from Zoom, so you have no idea what’s inside. The same is probably true for Windows – but I haven’t checked. So it’s generally safer to use a Mobile device rather than a desktop/laptop. [I don’t consider this a problem now. Zoom have increased their security and it’s MUCH MORE convenient to use a laptop/desktop as you can more easily see everyone on the call in a Gallery view – rather than having to scroll across images of people on a smaller screen device.]
Hints and tips on staying safe …
If you do decide to use Zoom, the company offers a few good tips on its blog for staying safe. First, don’t share a meeting link on social media or any public forum, because then anyone who sees it can join. This can lead to “Zoom bombing,” where bad actors crash the party, and drop off a payload of porn and/or other disruptions, before leaving. Something you definitely want to avoid!
Next, if you’re hosting the event, do not use your Personal Meeting ID (PMI) to do it. “Your PMI is basically one continuous meeting,” says Zoom, “and you don’t want randos crashing your personal virtual space after the party’s over.”
I use Scheduled Meetings even for Recurring Meetings, I can then send a Meeting Invite round in Beacon, that users just click on to join. This is much easier than sending out invites to every meeting.
Also, consider making use of the Zoom “Waiting Room,” which is a way to control who can get into your meeting. [This is now the default setting for a meeting.]You can then decide who you want to admit to the call. [This may not be relevant to your calls, but it’s worth bearing in mind if someone you don’t know somehow appears on the call. Next time they won’t because you’ll have implemented the Waiting Room.]
For more information on staying safe, read Zoom’s blog post, as mentioned above.
Zoom changed a couple of their Default settings from today – 5th April. Now when you join a meeting the default setting from the host is to ENABLE a Waiting Room, from which the Host can invite people in.
The second change is to set a Password on Personal Meeting IDs (PMI). It’s not recommended anyway to use PMI as it’s like a permanently open meeting; far better (if you’re the host), as I’ve described above and elsewhere, to create a specific meeting ID which sets a password anyway. Here’s a link that better explains these changes.
-
Setting up a Zoom meeting as Host
I've been asked by a couple of members how I set up the Zoom video-call meeting. This short video hopefully explains how I have done it – I'm sure others would suggest alternatives .
-
GPS jamming exercises – Ofcom
Thought you might be interested in seeing this. Don’t rely on your GPS signal if you’re within 50 miles of Sennybridge at the beginning of April …
The Ministry of Defence conduct occasional tests on military systems which may result in some loss of service to civilian users of the Global Positioning System (GPS) including in-car navigation devices and networks which rely on GPS signals.
— Read on www.ofcom.org.uk/spectrum/information/gps-jamming-exercises -
Getting started with Digital Photography (revisited) – Organising your pictures
This post re-visits a subject I looked at back in 2017, and developed last year when I looked at how Google Photos could be used for simple editing. The links to these posts are here …
First two posts which set out how I go about learning about photography and the decisions I made on which software to use …
Getting started with Digital Photography: Part 1
Getting started with Digital Photography: Part 2
Then three posts about using Google Photos …
Getting to grips with Google Photos
More Google Photos – some simple image manipulation
Sharing an image (or album) from Google Photos
… I haven’t checked that all the links are still “active”, so if you come across any that are not working, don’t despair, just let me know and I’ll sort it!
What this posts addresses is something much more fundamental
Tidying-up your photos and getting ready to import/process them
This is not a trivial task; for too many years your photo collection (and mine) has been allowed to grow unchecked and uncared for. The downside of digital photography is that you have no hard copy to sort into boxes, or albums, and no cases to put 35mm slides/transparencies into either!!
Taking a photo has become the end in itself, and because it’s so easy to do and it doesn’t cost much to take multiple pictures of the same scene/person, that’s what you do.
You know all this. I don’t need to tell you, and yet you keep on putting off the evil day when you have to do something about it and get to grips with sorting all those pictures out, labelling (tagging) them and putting them into some form when you can actually find the one you want, or the place/holiday/person you want without scrolling through loads of images whilst the person you want to show the picture(s) to politely (or perhaps not) waits for you to find (not always) the picture(s).
So now’s the time to sort your digital photo collection out. Get some order into them. Get rid of duplicates, and make a new year resolution to not let them get on top of you again. Read this article to see what you might need to do, and make a list of the things you might wish to do.
Let’s assume however that you’re starting from scratch, what would be a good set of practices …- Store all your pictures in one place on your computer – eg Google Photos on a Google Drive – and create a folder structure that helps you find them
- Tag them (to describe what/where/who is in them) and title them – img2634.jpg doesn’t tell you much!
- Back them up, consider using cloud storage for this as well – eg Google Drive, iCloud, Dropbox, OneDrive etc.
- Consider using an automatic way of backing-up the photos to the cloud so that they can be shared as well as preserved – eg Google Backup and Sync
… again you probably know all of that, but just in case!
Here’s an article that suggests a few tools to help you start the clean-up and another one from The Guardian.
So what’s my recommendation? Only one approach of many, but here it is … shoot it down!- If you don’t want to pay out anything to organise your Photos and you don’t have an Apple Mac – let Google do it for you (and this is the solution I’ll describe below).
- If you do have a Mac, use the Photos app on your iPhone or iPad and the Photos application on your Mac desktop or MacBook [a couple of provisos for this however based on sharing with non-Apple users, or using in a non-Apple environment].
- Create a Google Account, if you haven’t got one already, and get 15Gb of free Google Drive (cloud) storage and unlimited storage if you choose to store the photos in High Quality (rather than Original Quality).
It’s a good idea in any case to have a Google Account as it allows you to create another eMail address – I’m a strong advocate for having more than one eMail address anyway. Go to Google Accounts to setup your Google ID – you can use your existing eMail address if you want to. Then with your account set up you can go to this page. I would suggest you download the Backup and Sync application for your desktop at the same time. Installing the application on your Windows PC, or your Apple Mac, will then create a Google Drive Folder in which you can store information and which then will then be backed-up to your Google Drive “in the cloud”. Voila – you have peace of mind that your precious information has been saved. Any changes you make to the information will be synchronised with the version saved on your cloud storage. - Set Google Photos up as a folder in your Google Drive.
- Allow Backup and Sync to copy photos from your phone/tablet to Google Photos (in your Google Drive).
- Only Import photos from your camera to your computer into a Google Photos folder using a structure such as [Year]>[Month & Date]
- Change the name of your photos in the folder to something a bit more meaningful.
- Get ready for some processing and sharing.
