
Category: Miscellaneous
-
AI, chatbots and a new way to search
[Corrected information for Gemini in comparative section of post.]
A practical session following some demonstrations to encourage you to try out using Chatbot apps as an alternative to using a search engine. Of course most of the browsers and search engines now have the ability to “chat” added to them, ie Ecosia Chat and DuckDuckGo – which has the additional plus of you being able to choose which chatbot to use …

Claude tells me (as of October 2024) that the Edge, Opera, Chrome, Brave, Firefox and Arc browsers have this functionality, and Bing, Google (through Gemini), DuckDuckGo and Perplexity search tools have this functionality.
You can generate images too – but this is not the subject of today’s session. Look at Jonathan’s AI-generated avatar …

… or Phil’s set of images generated by Le Chat, from this script …

Screenshot 
Screenshot 


But we will look at how an image taken with your phone, or tablet, can be attached to a chatbot and get a summary of what it’s saying …

This (when sent to ChatGPT) with the one word message – “Summarise”, returned this …
- Online scamming is a global industry – It is vast, sophisticated, and growing rapidly, with criminal networks operating across borders.
- “Pig butchering” is a major scam method – Scammers build fake relationships with victims, emotionally manipulate them, and then convince them to invest in fraudulent schemes.
- Scamming is more dangerous than the drug trade – It operates beyond the reach of law enforcement, lacks regulation, and is highly scalable.
- Criminal compounds run large-scale scam operations – Many scams originate from compounds in Southeast Asia, where trafficked workers are forced into scamming.
- Advanced technology enables fraud – AI-generated voices, deepfake videos, and cryptocurrency help scammers operate anonymously and make their schemes more convincing.
- Scammers exploit human emotions – Victims fall prey to scams due to loneliness, fear, greed, and trust in online relationships.
- The economic impact is massive – Billions of dollars are stolen annually, affecting individuals, businesses, and economies.
- Law enforcement struggles to keep up – Scammers move money and people across jurisdictions faster than authorities can track them.
- International cooperation is needed – Countries must collaborate, working with banks, tech companies, and social media platforms to combat online fraud.
- Public awareness and education are crucial – Governments should implement stronger warnings and educational campaigns to prevent people from falling victim.
… but what is “pig butchering”, ask ChatGPT and you get this …
Pig butchering (shā zhū pán, 杀猪盘) is a sophisticated online scam that combines financial fraud with emotional manipulation. The term comes from the idea of “fattening up” a victim (the pig) before eventually “butchering” them for financial gain.
How It Works:
1. Initial Contact: Scammers approach victims through dating apps, social media, or even random text messages pretending to be a wrong number. They gradually build a friendly or romantic relationship.
2. Emotional Manipulation: Over weeks or months, scammers gain the victim’s trust, often pretending to be wealthy and successful. They encourage casual financial discussions, showing off their supposed investment profits.
3. Fake Investment Opportunity: Once trust is established, scammers introduce the victim to a “lucrative” investment, usually involving cryptocurrency or forex trading. They direct the victim to a fake but professional-looking website or app where they initially see small returns.
4. Encouraging Bigger Investments: As the victim gains confidence, they invest more money, sometimes even taking out loans or draining savings. The scammer keeps reinforcing the illusion of profits.
5. The Exit (Butchering Phase): Eventually, when the victim tries to withdraw funds, they encounter delays, extra fees, or are locked out entirely. The scammer then disappears, leaving the victim financially devastated.
6. Trafficking Connection: Many pig-butchering scams are operated from compounds in Southeast Asia, where trafficked workers are forced to run scams under threat of violence.Why It’s Effective:
• Long-term manipulation: Unlike quick scams, it relies on slowly building trust.
• Emotional exploitation: Victims often feel emotionally invested, making them less skeptical.
• Convincing fake platforms: Sophisticated websites mimic real investment sites, making the scam seem legitimate.
• Cryptocurrency anonymity: Crypto transactions make it difficult to trace stolen money.This type of fraud is one of the fastest-growing online crimes, with billions of dollars stolen worldwide each year.
That’s phenomenally powerful and time-saving!
So we’re going to look at installing some Chatbot apps, and doing some comparative enquiries, and end-up having some fun – I hope.
Le Chat helps me write this … “Provide a list of the most popular AI Chatbots, whether they’re open source and who they’re funded by?”
Here is a list of some of the most popular AI chatbots, their open-source status, and their funding sources:
- ChatGPT: Developed by OpenAI, ChatGPT is one of the most widely used AI chatbots. It is not open-source and is funded by Microsoft and other investors.
- Claude: Created by Anthropic, Claude is known for its conversational abilities and is considered one of the best overall AI chatbots. It is not open-source and has received significant funding from various investors.
- Google Gemini: Formerly known as Bard, Gemini is Google’s AI chatbot integrated with Google services. It is not open-source and is funded by Google.
- Microsoft Copilot: This AI chatbot is developed by Microsoft in collaboration with OpenAI. It is not open-source and is funded by Microsoft.
- Llama 3 by Meta: An open-source AI chatbot released by Meta AI. It is designed to be freely available for anyone to use and build upon. It is funded by Meta.
- Perplexity AI: Known for its ability to search the internet and provide relevant data, Perplexity AI is not open-source and is funded by various investors.
- Jasper AI: This AI chatbot is tailored for content creation and marketing. It is not open-source and is funded by various investors.
- Poe: Created by Quora, Poe allows users to access multiple AI models in one tool. It is not open-source and is funded by Quora.
- Rasa: A popular open-source framework for building conversational AI assistants. It is funded by various investors and is widely used in the developer community.
- DeepPavlov: An open-source conversational AI framework designed for developing production-ready chatbots. It is funded by various research grants and investments.
These AI chatbots represent a mix of open-source and proprietary solutions, each with its own strengths and funding sources.
Of these I do like Claude, Perplexity and Le Chat in particular, but Le Chat wasn’t in this list, why? I followed up my initial query with – “Why isn’t Le Chat in this list?”
Le Chat is an AI chatbot developed by Mistral AI, a French startup. It is designed to be a fast and efficient conversational assistant, capable of processing up to 1,000 words per second, making it one of the fastest AI models available. Le Chat is available as a native app for iOS and offers a range of features, including image analysis, content generation, and real-time internet searches. It is positioned as a European alternative to other AI chatbots like ChatGPT and Google Gemini.
Mistral AI has attracted significant investment from various sources, including American tech giants like Nvidia and IBM, as well as funding from the French government and other European investors. The company has also received support from France’s defense ministry and other European entities, highlighting its strategic importance in the region’s AI landscape.
Le Chat is part of Europe’s broader push for AI independence and is seen as a key player in the continent’s efforts to compete with major AI developers in the US and China. The chatbot is designed to offer strong privacy protections and aligns with European values regarding data security.
That’s why I like Le Chat – an element of independence from the US, but I suspect there will be a UK killer-chatbot in the wings!!!
I thought I’d do a comparative query across the different AI Chatbots I use – but in their web format so that I could do screenshots for this post [the responses would be the same on the phone/tablet – just easier for doing screenshots]. The query was fed to me by my daughter, and I followed the responses with some supplementaries (which I’m not including), but you’ll get the idea …
The enquiry … “In the UK, what I should plant in a western-facing partly shady coastal front garden with clayish soil?”
Le Chat – https://mistral.ai/products/le-chat

Screenshot Perplexity (on the web I was given Perplexity Pro – presumable for a trial period) – https://www.perplexity.ai
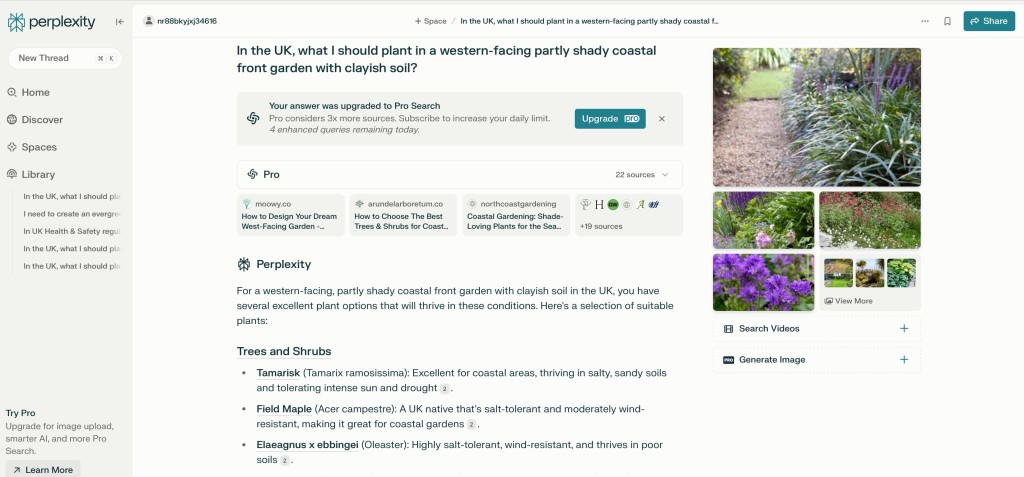
Screenshot For a full response – https://www.perplexity.ai/search/in-the-uk-what-i-should-plant-pu_I4lpmTKWVfR1U17OmrA
Claude – https://claude.ai/new
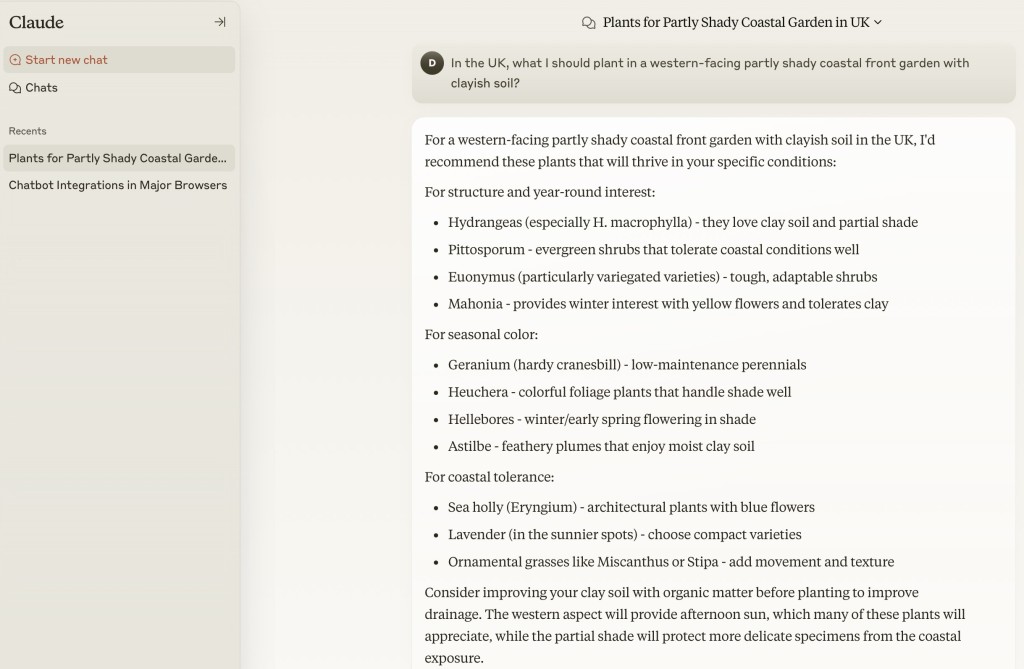
Screenshot the extreme – perhaps you have to pay to get access to Google’s own AI LLM – I’m happy to be corrected here!
Gemini (in a browser) returns this response …
https://g.co/gemini/share/ff8bfa44ae92
So to see how Gemini (in a browser looks), go to https/gemini.google.com register (or use your Google account) and type in the enquiry. From the Gemini app it looks something like this …
In the UK, what I should plant in a western-facing partly shady coastal front garden with clayish soil? 🤗

It's great you're planning your coastal garden! Coastal gardens in the UK present some unique challenges, but also opportunities. Here's a breakdown of considerations and plant suggestions, taking into account your western-facing, partly shady, clayish soil conditions:
Key Challenges:
 * Coastal Conditions:
   * Salt spray: Plants need to tolerate salty air.
   * Strong winds: Choose robust, wind-resistant plants.
   * Potential for sandy, but in your case clayish soil.
 * Western-Facing, Partly Shady:
   * Western exposure means afternoon sun, which can be intense.
   * "Partly shady" requires plants that can handle some shade but also appreciate some sun.
 * Clayish Soil:
   * Clay soil can be waterlogged in winter and dry and cracked in summer.
   * It's essential to select plants that tolerate these conditions or amend the soil.
Plant Recommendations:
Here's a selection of plants that generally thrive in these conditions:
 * Shrubs:
   * Escallonia: Very tolerant of coastal conditions and wind.
   * Photinia: Provides vibrant foliage and tolerates clay soil.
   * Hebe: Many varieties are well-suited to coastal gardens.
   * Lonicera nitida (shrubby honeysuckle): Good for hedging, tolerant of various conditions.
 * Perennials:
   * Hostas: Thrive in partial shade and tolerate clay.
   * Ferns: Many ferns enjoy shady, moist conditions (clay can hold moisture).
   * Pulmonaria (lungwort): Tolerates shade and clay soil.
   * Geraniums (hardy): Many varieties are adaptable to various conditions.
   * Sea thrift (Armeria maritima): Excellent for coastal areas.
 * Grasses:
   * Carex varieties: Many sedges tolerate clay soil and partial shade.
   * Festuca glauca (blue fescue): Can add textural interest.
Tips for Clay Soil:
 * Improve drainage: Incorporate organic matter like compost or well-rotted manure to improve soil structure.
 * Mulching: Apply a mulch to help retain moisture in summer and protect roots in winter.
 * Raised beds: Consider raised beds if drainage is a significant issue.
Where to Get More Information:
 * Royal Horticultural Society (RHS): The RHS website (rhs.org.uk) is an excellent resource for plant information and gardening advice.
 * Local Garden Centres: Local garden centres can provide tailored advice for your specific area.
When choosing plants, always check their specific requirements and consider your garden's microclimate.
Copilot – https://copilot.microsoft.com/chats/tBUeqP4WXhs3BKq8a6zy5. It has to be said the app version is quite different in appearance (so I include it below as well.
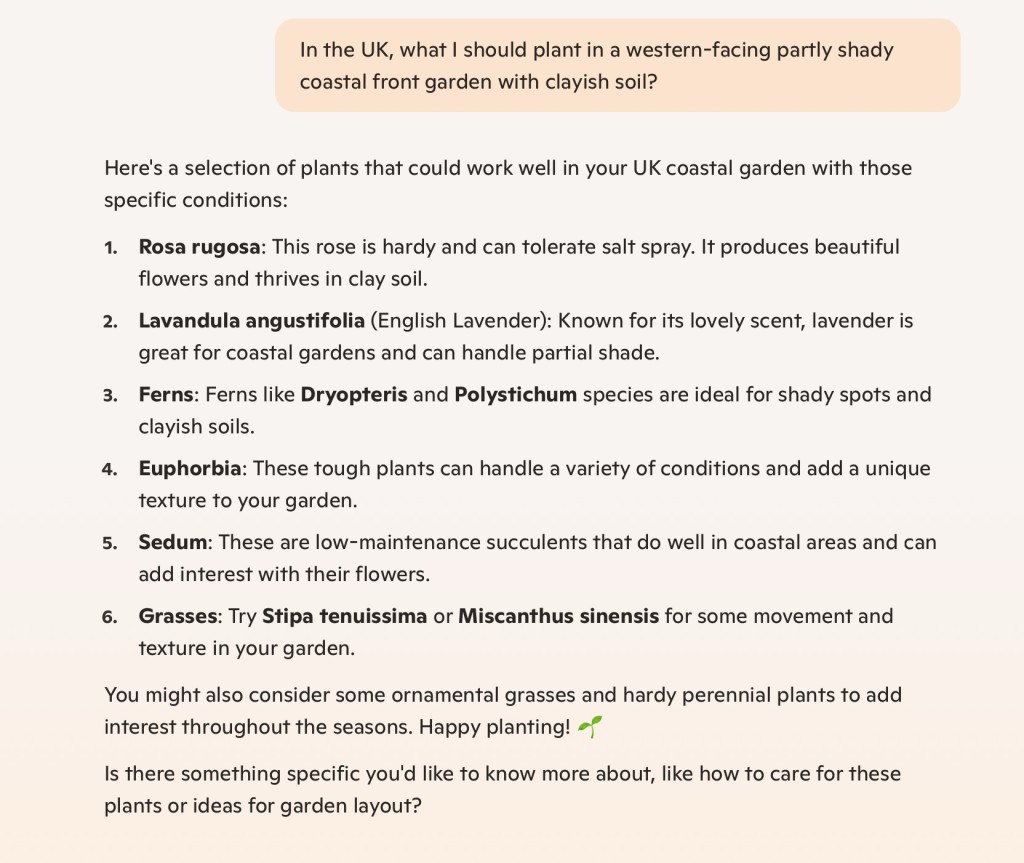
Screenshot In the UK, what I should plant in a western-facing partly shady coastal front garden with clayish soil? 🤗
Ah, a coastal garden in Wales with clayish soil—sounds like a wonderful challenge! For a western-facing garden with partial shade and a seaside breeze, you'll want plants that can handle salt spray, thrive in heavy soil, and enjoy a mix of sun and shade.
Here are some suggestions:
### Perennials and Shrubs:
1. **Eryngium (Sea Holly)** - Perfect for coastal gardens with its striking, spiky flowers and tolerance for salty air.
2. **Hydrangea macrophylla** - Thrives in clay soil and gives fabulous blooms, especially in partial shade.
3. **Hebe** - Compact, hardy, and salt-tolerant, making it ideal for coastal fronts.
4. **Skimmia japonica** - Great for partial shade, and its colorful berries add winter interest.
5. **Rosa rugosa (Beach Rose)** - Tolerates tough coastal conditions and produces lovely fragrant flowers.
### Grasses:
1. **Carex (Sedges)** - Many varieties thrive in clay soil and are low-maintenance.
2. **Festuca glauca (Blue Fescue)** - Adds texture and color, and it’s very hardy.
3. **Miscanthus sinensis** - Works well in heavier soils and creates a striking backdrop.
### Flowering Plants:
1. **Alchemilla mollis (Lady's Mantle)** - Thrives in partial shade and tolerates clay, with charming frothy flowers.
2. **Astrantia** - Adds a touch of elegance with its intricate blooms and loves partial shade.
3. **Primula vulgaris (Primrose)** - Ideal for dappled shade, and they bring an early splash of color.
### Ground Covers:
1. **Ajuga reptans (Bugleweed)** - Tolerates clay and partial shade while offering glossy foliage and purple flowers.
2. **Vinca minor (Lesser Periwinkle)** - A hardy ground cover that thrives in shady spots.
It’s also worth working organic matter like well-rotted compost into the clay soil to improve drainage and structure over time. Coastal gardens can be unique, so experimenting with a mix of hardy and native plants might lead to delightful surprises. 😊
What do you think about these options? Let me know if you'd like specific care tips or alternatives!I hope that’s of interest; I encourage you to do your own comparative enquiries, bearing in mind that they don’t all have access to up-to-date information.
The world is changing rapidly, and my son has already demonstrated that he can build the code for the front-end of a website using a chatbot which he incorporated into his DuckDuckGo browser …
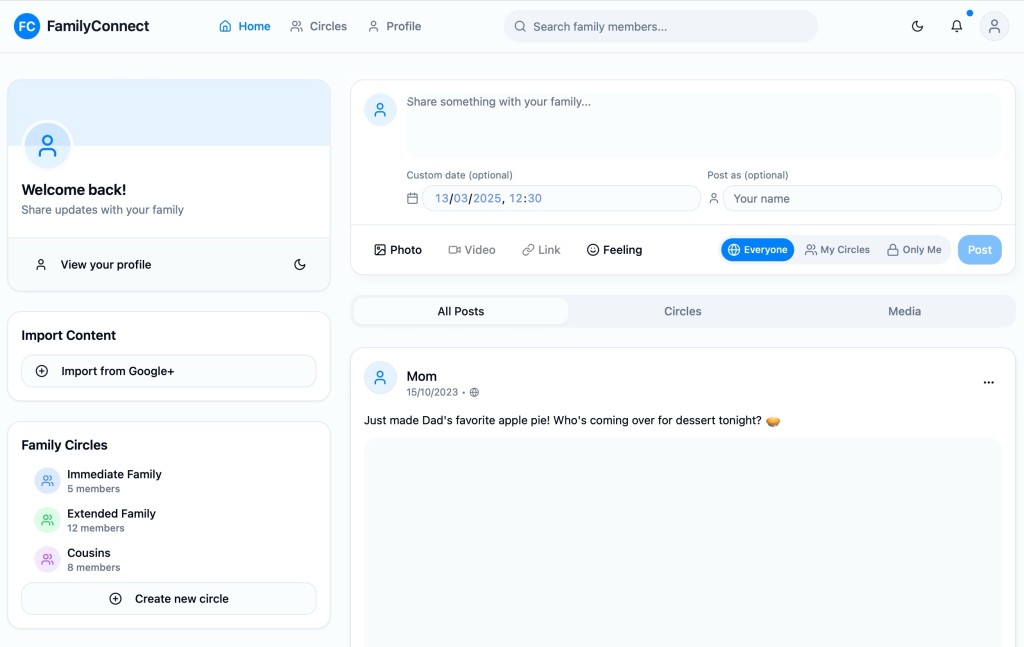
Screenshot … with the following instructions …
“I asked my new AI app writing tool to build me a private social networking tool inspired by Google+ features.
Just done the front end design, but I can add a database and I can get it to setup federation with Google login.
It’s mobile responsive as well.”
… now that’s truly amazing, but I digress.
Creating a sitcom
First prompt.
Can you come up with some sitcom names that would cover two elderly people, one who loves technology and loves setting up systems, and the other who has no idea?
then i got names … i responded -> I like wired and retired.
Second prompt
Can you write the premise of the show. The grandad gets very frustrated cause he sets up all these amazing systems and is energised by tech but his wife (grandma) is airy fairy and likes more human pursuits and poetry and gardening and is shocking at planning and execution. Both are lovely.
This was the response.
Show Title: Wired and Retired
Premise:
In the quiet suburbs, a lively retired couple navigates the collision of their wildly different passions. Frank, a tech-obsessed granddad, thrives on systems, automation, and the latest gadgets. His garage is a command center, his home a hub of interconnected brilliance—at least in his mind. Meanwhile, Betty, his whimsical wife, prefers the analog world. She spends her days writing poetry, tending to her unruly garden, and losing herself in daydreams.Their love is undeniable, but their worlds often clash in hilarious ways. Frank’s perfectly calibrated smart irrigation system gets overrun by Betty’s impulsive planting sprees. His meticulous meal-planning app gets sidelined when Betty decides dinner should be a spontaneous pic… Read more
then he just kept asking questions
until he got to …
Updated Premise:
Retired life for Frank and Betty is far from quiet. Frank, a tech-obsessed granddad, keeps busy in his upstairs office, perfecting his gadgets, cheering for West Ham, and sneaking out for his favorite snack, ‘Nice and Spicy’ Nik Naks. Betty, his free-spirited wife, thrives on poetry, gardening, and unplanned adventures that constantly disrupt Frank’s meticulously planned systems.Their quirky family dynamic adds another layer of hilarity. Their 40-something son, who lives nearby, frequently steps in as mediator and problem solver, though his visible hair loss suggests he’s barely holding it together. Their older son, who lives in Australia, adds to the chaos during his visits, gleefully stirring up trouble and playing both parents off each other.
Balancing out the chaos is their serious older daughter, a psychologist, who watches the family dynamics with professional concern. She often finds herself frustrated with her brothers’ antics and their impact on her parents, though her attempts to intervene usually go unnoticed.
Adding warmth to the mix is their youngest daughter, who lives close by with her young family. Betty adores spending time with her grandchildren, but her tendency to lose track of time often leaves Frank exasperated when she abandons his carefully laid plans for yet another spontaneous outing.
Through all the love, laughter, and occasional family drama, Frank and Betty prove that life is always better with a little humor—and a lot of heart.
Supporting Characters:
• Millie: The tech-savvy granddaughter who enjoys Frank’s high-tech world but often teams up with Betty during family adventures.
• George: Frank’s West Ham-loving best mate and snack-run partner, who adds to the laughs.
• Dorothy: Betty’s poetic and gardening partner, who fuels her creative chaos.
• Alan: The middle son, a local, stressed-out mediator whose receding hairline marks his thankless efforts to keep the peace.
• David: The mischievous older son from Australia, who stirs up trouble whenever he visits.
• Clara: The serious older daughter, a psychologist, who’s always concerned about the family’s dynamics, especially her brothers’ antics.
• Lucy: The youngest daughter, whose young family brings joy and chaos into Betty’s life, often making her forget time (and Frank’s plans).Tone:
A heartwarming sitcom full of humor and relatable family moments, Wired and Retired celebrates the beauty of intergenerational dynamics, proving that even in retirement, life is a delightful blend of love, laughter, and just enough chaos to keep things interesting.… and then we got Episodes of the sitcom …
Episode Titles:
1. “Password Protected”
Frank’s new smart home security system locks Betty out after she forgets the password during a gardening spree. Alan is called in to mediate, only for the system to malfunction spectacularly during a surprise visit from David.
2. “Nik Nak Sneak Attack”
Frank’s secret snack stash is discovered by Betty, who replaces his ‘Nice and Spivey’ Nik Naks with healthy alternatives. Desperate to retrieve his beloved snack, Frank ropes Millie into a covert snack run that goes hilariously wrong.
3. “The Poetry of Football”
Frank prepares for a big West Ham match, but Betty accidentally double-books the living room for her poetry club meeting. Clara arrives to mediate, but her psychological insights only make matters worse.
4. “Down the Rabbit Hole”
Betty gets caught up babysitting Lucy’s kids and loses track of time, leaving Frank stranded at a gadget expo. When Lucy apologizes, Frank realizes he enjoys the quiet chaos of his grandkids—until they discover his gadgets.
5. “Springsteen & Shenanigans”
David’s visit from Australia throws the household into disarray as he tries to convince Frank to join a local Springsteen tribute band while secretly encouraging Betty to paint her garden shed bright pink. Alan is left to clean up the mess.
6. “Psychologist vs. Chaos”
Clara decides to hold a family therapy session to address everyone’s dynamics. But when old grudges resurface and Frank’s gadgets interrupt the session, Clara questions if anyone can truly retire from family drama.and a 30-Minute Episode Outline:
Episode: “Password Protected”
- Cold Open (2-3 minutes)
Betty struggles with Frank’s new voice-activated front door lock after forgetting the password. She tries random phrases (“Bruce Springsteen rules!”) but is locked out. Frank smugly explains the system’s brilliance—until it locks him out too. - Setup (5-6 minutes)
Frank works on fixing the system while Betty heads to the garden, only to accidentally trigger the motion sensors. Chaos ensues as Frank’s phone floods with alerts. Alan shows up after receiving a frantic call from Betty. - Rising Action (6-8 minutes)
Alan tries to mediate, but the system glitches and locks everyone—including Millie, who came to help—inside the house. Betty starts reciting poetry to keep calm, which Frank finds infuriating. Meanwhile, David calls from Australia, adding comic commentary. - Climax (7-8 minutes)
Alan manages to bypass the system just as Betty’s gardening friends arrive for tea, unwittingly triggering the alarms again. Frank declares the system a failure and blames Betty, who points out she only wanted a simple lock and key. - Resolution (3-4 minutes)
Frank reluctantly agrees to simplify the system but secretly tinkers with it that evening. Betty catches him sneaking a Nik Nak, teasing him that even his snacks need a password.
Tag Scene (1 minute)
The system malfunctions during the night, locking the entire family in the bedroom. Betty smirks, “At least we’re safe from burglars.” Frank sighs, “Or freedom.”Each episode mixes laugh-out-loud situations with heartfelt moments, showing that even retirement is full of surprises!
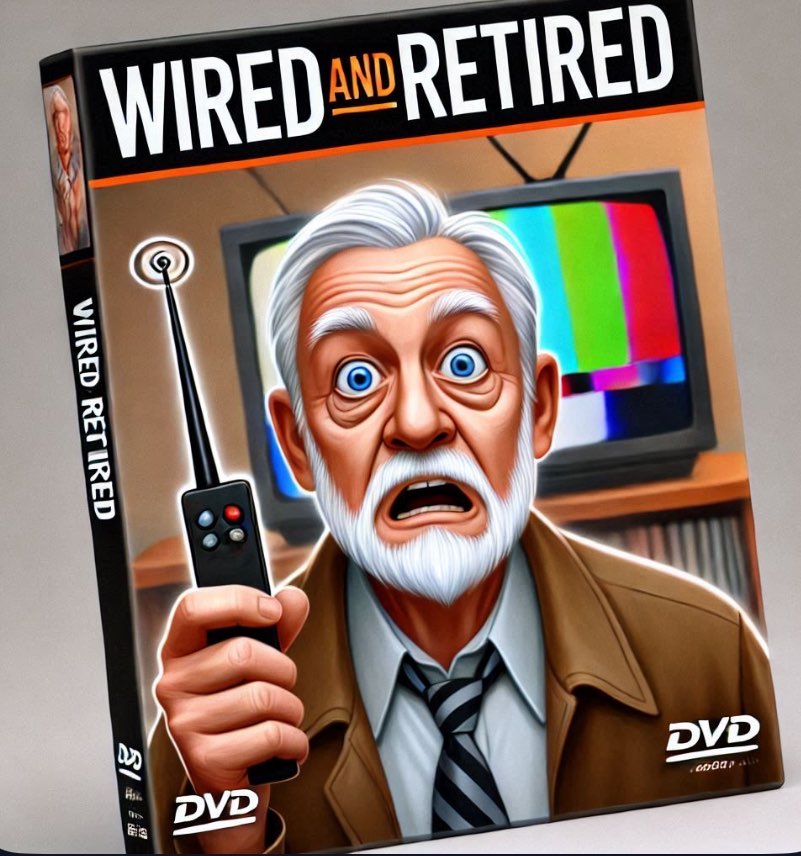
Now it’s your turn!!!! This was all generated using ChatGPT, but the other AI chatbots could probably do the same.
- Online scamming is a global industry – It is vast, sophisticated, and growing rapidly, with criminal networks operating across borders.
-
A new dawn for the website?
Hopefully, the changes made to the website will make it more accessible. The blog posts that members have indicated could be made public are now accessible from the Home page, without a need to login. Some of the menus have changed a bit to accommodate this change and I’ve had to do some other cosmetic changes that I challenge you to discover!!!
For members who login, they will have access to everything that was there before. The menu tabs have not changed and the Forums and Topics area remains untouched. I’m keen to encourage more registered members to use this area of the website, as I’m keen to encourage them to use the various Signal groups that have been setup. Links to these groups for members who have downloaded Signal and created an account are available from the Digital Matters tab – once you’ve logged in.
All will become clear, hopefully … in the course of time.
Cheers. David.
-
Digital matters does Energy!
Updated 6th September 2024
A further update to comment upon our experience with Intelligent Octopus Flux. The change to the tariff went smoothly enough; the extraction from it to change to another one didn’t go smoothly, although I can’t fault the support from Octopus – just the documentation they had to follow to enable a move off the tariff. After a few weeks on Intelligent Octopus Flux, it became apparent that it might well be a good tariff for the winter (and for anyone not wanting to actively manage their solar and battery), but not necessarily for the summer when our solar power generation was at its optimum level. I won’t go into details – maybe another post sometime – but we moved on to Agile Octopus for Import and Fixed Octopus for Export, which enabled us to take advantage of both “plunge pricing”, and also allowed us to choose when to charge up the battery from the grid, and to what level. [This takes about 2mins each day after 16:00 when the pricing for the following day becomes available using this website – which gives the pricing of electricity from the grid region by region.] In summary, Intelligent Octopus Flux appears to maximise the benefit to Octopus by allowing them to use your battery for off-grid storage, and not enable the maximum charging of your battery. Good for the planet, but not necessarily good for the consumer with an investment in solar panels and battery.
Updated 18th July 2024
This post to accompany the presentation on 11th July could be sub-titled “The data driven house”; but most certainly not “The smart house” – it would be along-time before our early-Edwardian semi could even begin to compete in that category. However, over the last year we have move significantly to reduce our carbon footprint and I believe saved quite a lot of money off our household bills – at the expense it has to be said of a reduction in our capital. Spending the kids Inheritance so-to-speak, but with their full support and encouragement. So here goes …
A brief history of our energy in days gone by.
We’ve tried over the years to switch suppliers and have been with EDF, E-On before a long-stint with British Gas which we switched to when we got our first smart meter, partly on the promise of supplying us with a tool to monitor our energy usage in an app.
However the smart meter they supplied us with was a SMETS-1 one which was soon after our installation replaced in the national rollout by a SMETS-2 version – but not given to existing customers. We were assured that British Gas was working with the regulators to ensure compatibility which would also allow users to switch providers seamlessly – but this never happened. Whilst other suppliers (eg Octopus) have found a way of jury-rigging SMETS-1 meters to work with their smart tariffs, British Gas have done nothing. In fact our experience was even worse because after a period of time (perhaps a couple of years) the app ceased giving usage information to us. We pursued them for at least 18 months but eventually – disgusted with their lack of customer service and inability to respond to enquiries first, and then complaints, we decided we should move suppliers. Family members had already chosen Ovo, and Octopus, and on their experience and after substantial review and research, and also following the recommendation from Which? we chose to switch to Octopus using our existing SMETS-1 meter – with the assurance that we could, and would, be upgraded to the SMETS-2 system in due course. This meant initially we would have no monitoring locally, but we would have access to their excellent website to monitor our usage. We had to take quite a few meter readings during the switch-over period – presumably whilst they got their systems talking to our SMETS-1 meter -but we did the switch and joined their standard Octopus Flexible tariff.
Around about the same time we got confirmation that we would have to tackle the heating of the kitchen as Jenny had a confirmed diagnosis of a health issue that meant we would have to ensure the house was much warmer than it had been in previous years. [We have been extraordinarily fortunate that last winter must have been one of the mildest on record.] So we (or Jenny to be accurate) set about getting draft excluders, heavier lined curtains, the purchase of Chimney Sheep draft excluders, replacement of double glazing with triple glazing in the main rooms Jenny used, enhancement of the insulation in the space above the kitchen extension and … upgrading of the heating in the kitchen and garden room using Infra-red Panels.
These we researched on the recommendation of a friend who has started progressively to replace all the traditional gas-heated water-filled radiators in their house with IR panels.
We visited Herschel in Bristol. We were hugely impressed at the rapid and effective performance of the panels, the fact they could be mounted on the ceilings, or walls, or standalone, and that some could have pictures or even mirrors on them, and also the low power draw and the fact they could be controlled as smart devices. Herschel provided us with an estimate of the requirement to meet our needs. We asked them to provide details of a local approved installer, who we contacted and came to do a site visit. They proposed a larger pair of panels than Herschel had suggested and furthermore suggested also fitting an IR unit in the garden room, which has not been used as yet, but it was logical to install it at the same time – future-proofing the back of the house in its heating needs..
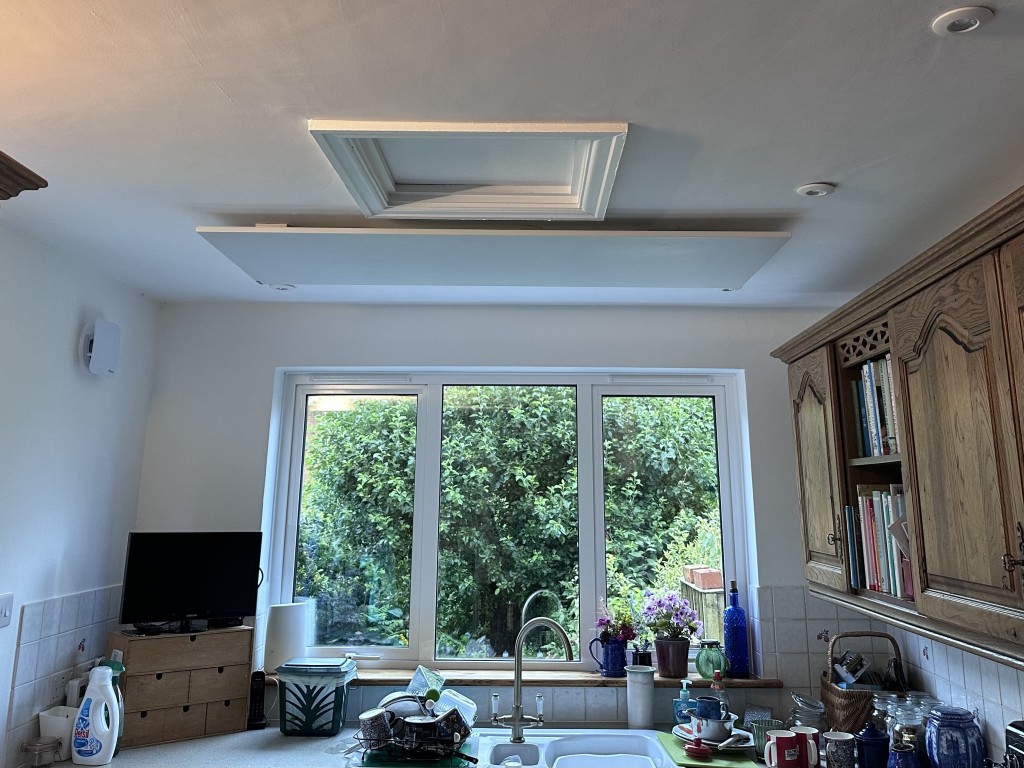
View of kitchen triple glazed windows with IR Panel (1100W) in ceiling The installer mentioned that he could provide good pricing on Solar panels and batteries and VAT-free panels if done as one installation. [It also has to be added that he was able to get the panels at discount from Herschel, so although the units could be installed by any competent electrician (or even me!) the purchase of the units was cheaper than if we had ordered direct.] We had experience soft-pressure from the family to “do something green” – so went for it realising that we could never recover the installation costs in our lifetime but we could reduce our usage costs which were heading towards £3,600 (British Gas) in our old Edwardian house and likely to go higher.
At this time I also researched whether an air source heat pump might be a good idea but determined that given the generally poor insulation of our old house, such a solution would not be a great idea, but that a gradual replacement (as my friend was doing) of replacing radiators with IR panels when a room was being decorated was the better way to go.
The installation of the IR panels, the solar panels and the battery was very professional and they followed my preference for siting of cable routing and units so that it was very difficult to see what had been done. The after-sales support, warranty and documentation they provided was excellent, and it’s comforting to know that Craig is just a WhatsApp call away and can monitor our system and make changes as necessary.

Enphase solar panels (5) on top roof 
Solar panels on kitchen extension (4) – solar panels on side (top) roof not shown (2) 
GivEnergy All-in-One Battery using micro-inverters (13.5kWh capacity) 
GivEnergy Gateway connecting Battery to Grid and to Household supply When we had committed to the installation I also started pressuring Octopus to provide us with a SMETS-2 meter so that we could benefit from Smart Tariffs. They responded in a reasonable time (I suppose given the backlog of their work), but after continual pressure, the electric and gas meters were replaced, and we had new meters and the mini-hub – which allows the meters to communicate with the app on the smart phone/tablet – in place by late-October following a September installation of the solar panels and battery. Now the fun could really start!
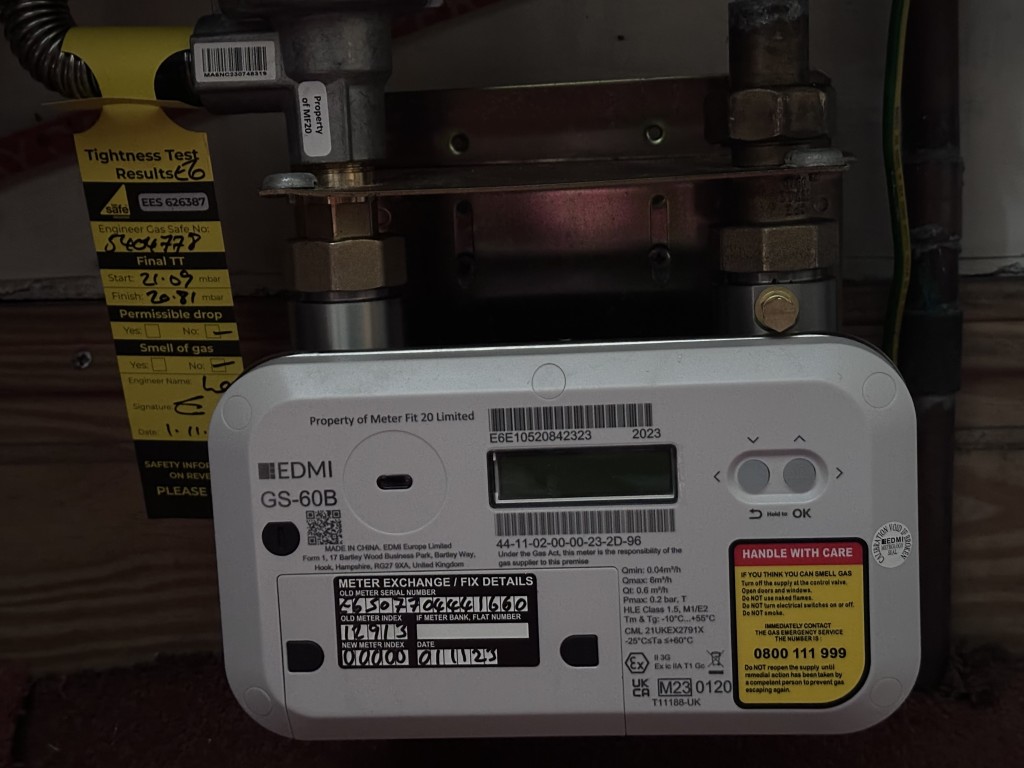
Replacement SMETS-2 gas meter from Octopus 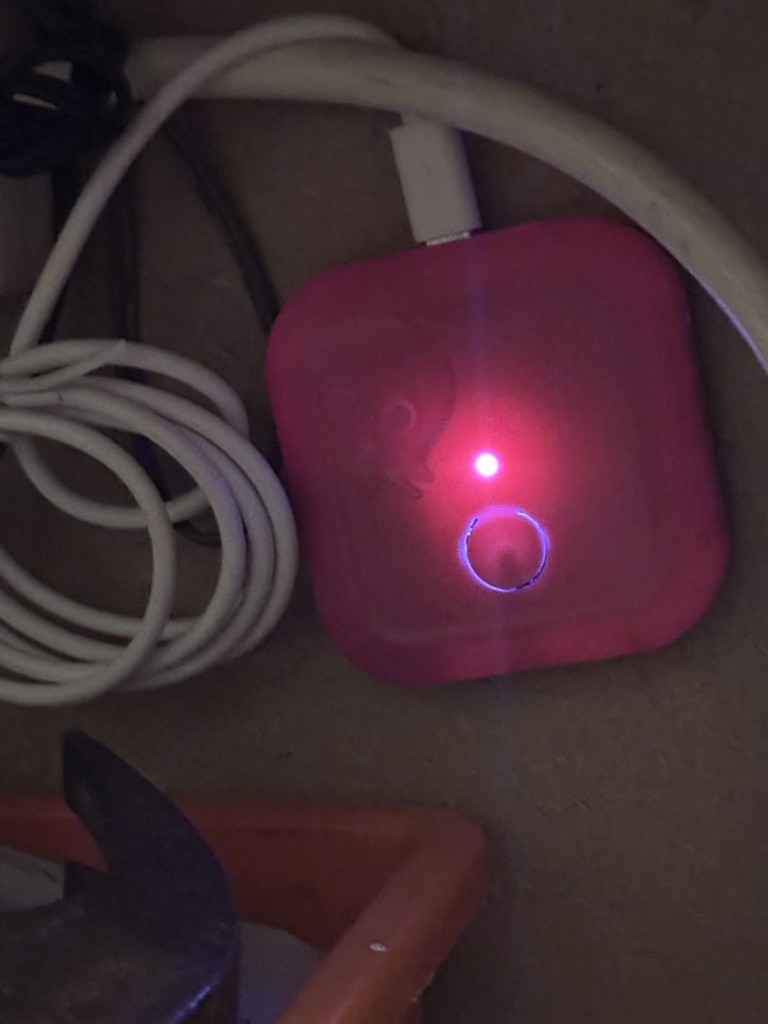
Octopus mini-hub to connect smart meters to Home network for monitoring locally. Choice of tariff
Octopus has many, many tariffs. It would be impossible to go through them here, but be advised that if you have an EV (electric vehicle), or a heat pump, there are tariffs for you. They also provide tools to help you decide which tariff is the right one for you. We however were only interested in those that worked best with our solar panels and battery. The obvious one for us to start with was Octopus Flux. This had the benefit of allowing us to charge our battery up to its maximum for a very low rate between 02:00 and 05:00 and enable us to discharge from the batter gradually through the day whilst with the management of the GivEnergy battery we could ensure that there was a full battery for the hours of 16:00 to 19:00. It also ensured that the battery was full when we most wanted heat from the IR panels so we set them to kick-in at 04:00 in the morning and with scheduled time periods arranged for them to be on (subject to the temperature not exceeding the threshold) when we needed them on.
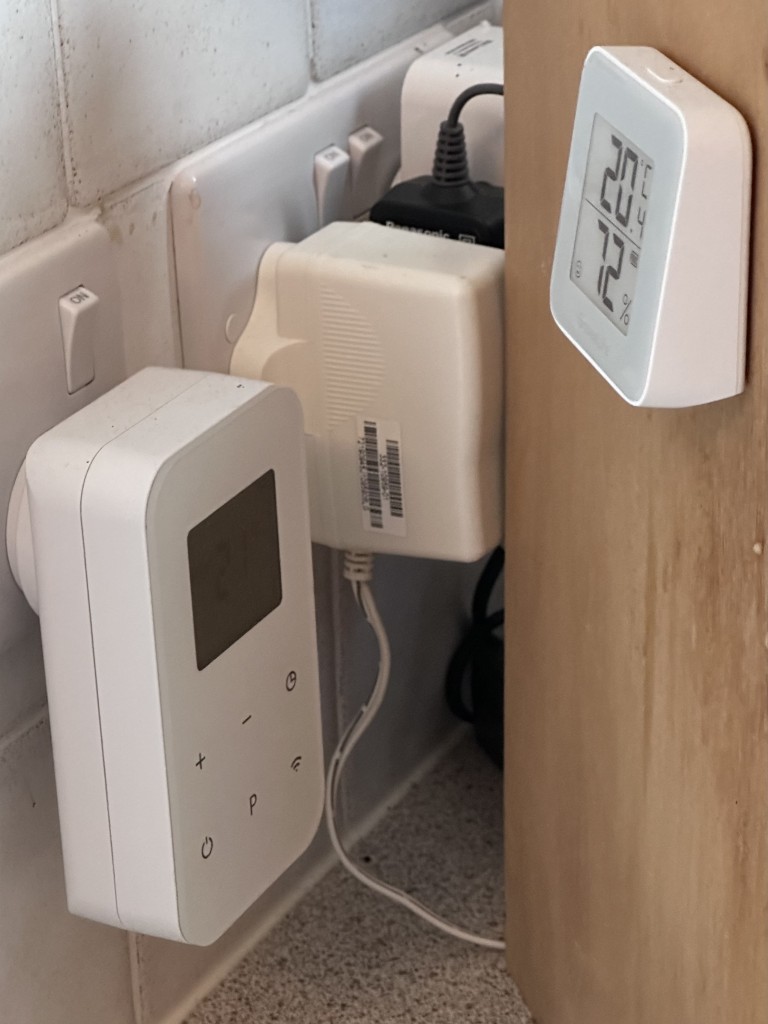
Herschel Plugin WiFi Thermostat and Govee smart temperature device to check thermostat Monitoring, reduction in monthly direct debit
I started an intensive monitoring of our electricity usage, changing the various settings possible on the GivEnergy Dashboard
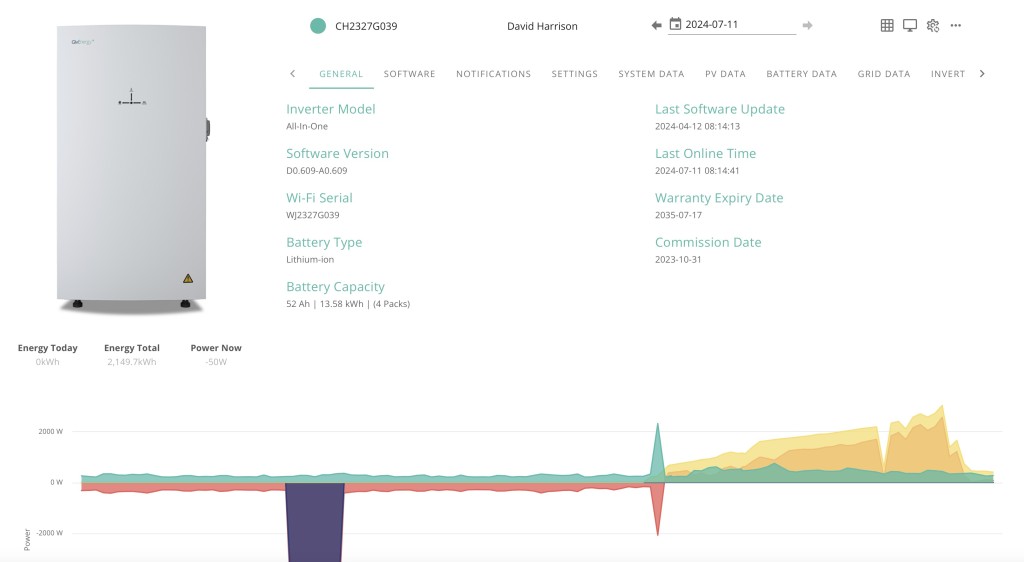
The dashboard control for the inverter and battery 
Screenshot of what is happening to your GivEnergy Battery on the web dashboard I won’t detail the experiments and changes I tried. Suffice to say it educated me about how the system could work and what I needed to consider to get optimum benefit from the system/installation. I was also very soon able to reduce the monthly direct debit that we were paying to Octopus from the initial figure they suggested (when on the standard Flexible tariff – which in itself was less than the £300 that BG had wanted from us) to now £200 a month – and we’re over £600 in credit at the moment. So an immediate 33% reduction in our energy costs – but it could be more!!!
Octopus Flux pays you when your system exports to the grid. The payment you get is less than the amount you’re paying for the import of power into the household. Last year Octopus introduced a tariff that was the same for import and export, which meant that charging the battery at a fixed time no longer was necessary and that you could get a higher payback for export during the grid high-demand period of 16:00 to 19:00. So it seemed a tariff I should try out.
Change of tariff to Intelligent Octopus Flux
We’ve been on this tariff now since May and I have had some issues with understanding how exactly it works, but essentially you’re letting your battery be controlled by Octopus and become part of the National Grid. I don’t have any difficulties with that after learning that the grid is just one huge battery effectively and that the cable that feeds your house doesn’t effectively belong to anyone except the National Grid (or its surrogates). However I’m having a dialogue with them currently on the range of battery charging/discharging they’re deploying and whether it’s too narrow. When I was on Octopus Flux I was charging the battery to 100% between 02:00 and 05:00, or something less if there was a lot of sun expected in the day, and discharging down to as low as 4%. Currently Intelligent Octopus Flux appears to be only operating in a range of 55% to 77%. I’m asking them why??
The upshot of this is that if you’re prepared to be an active battery monitor, it might be worthwhile to be on Octopus Flux, if you’re passive (or just want to save the planet), then Intelligent Octopus Flux is the one for you. I suspect a combination is best for us with Octopus Flux in the winter 6 months, and Intelligent Octopus Flux in the summer 6 months. Especially if I can combine it with smart monitoring for the winter months. Watch this space!!
For completeness, the screens from the various apps I’m using …
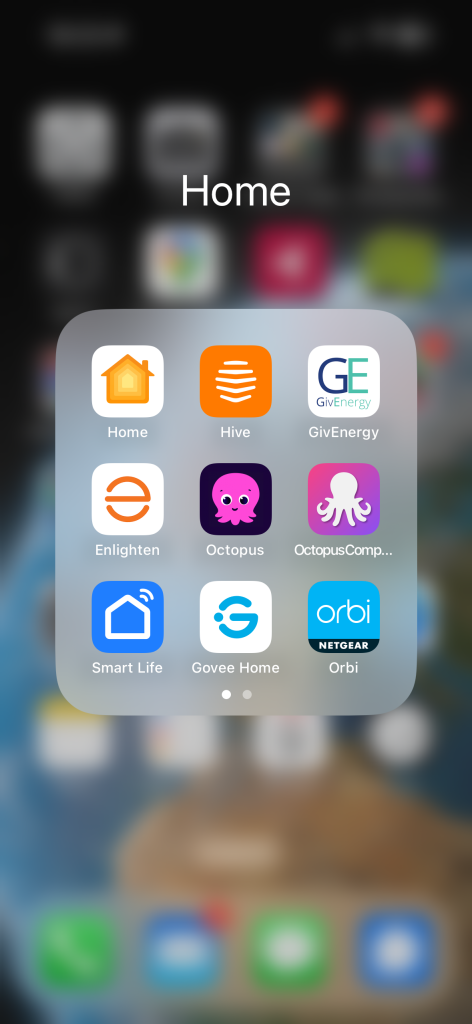
The apps I use in the Home 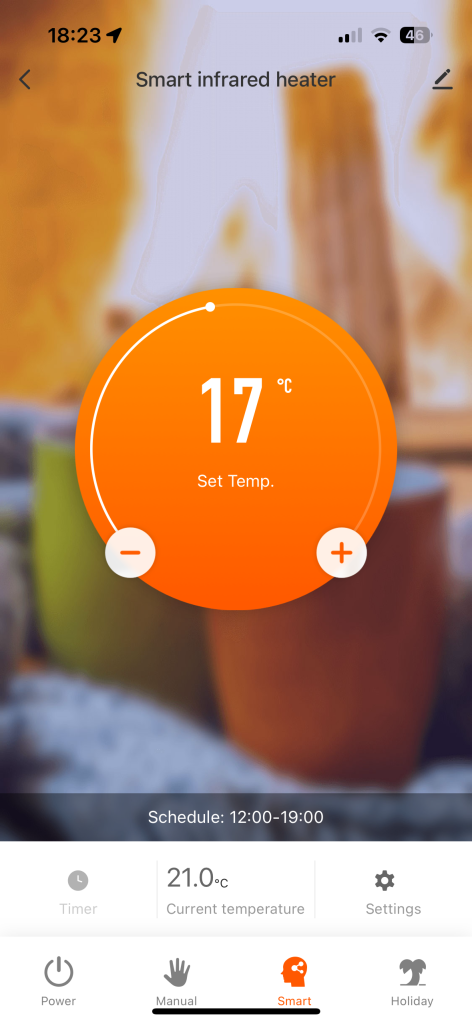
The control screen for the IR panels 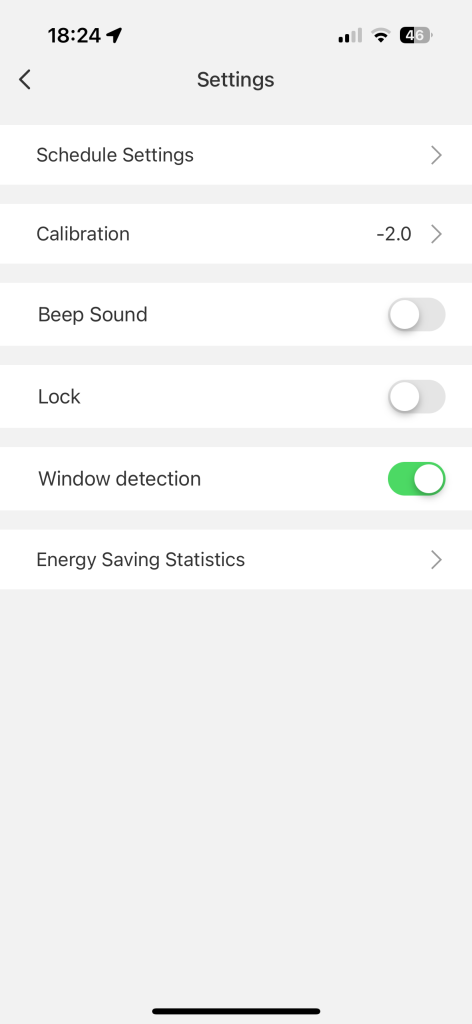
The settings screen for the IR panels 
Govee smart temperature and humidity 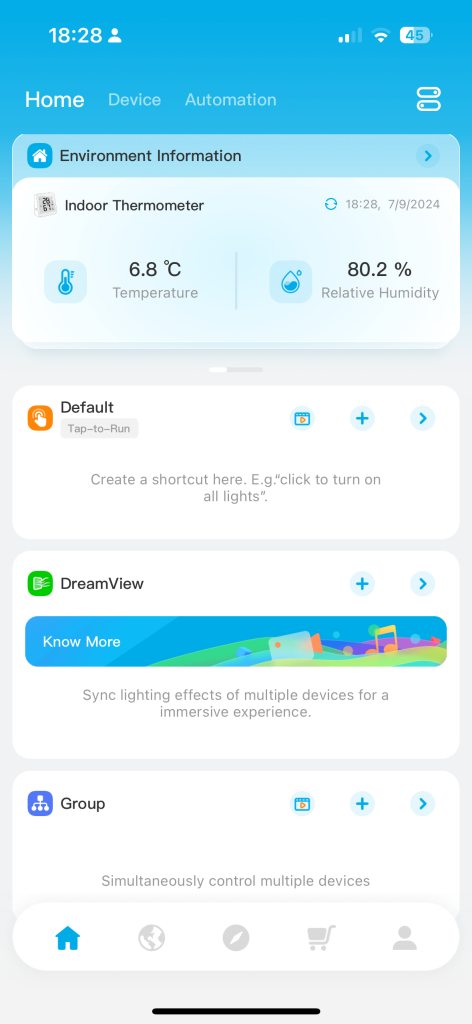
Govee dashboard 
GivEnergy app Dashboard 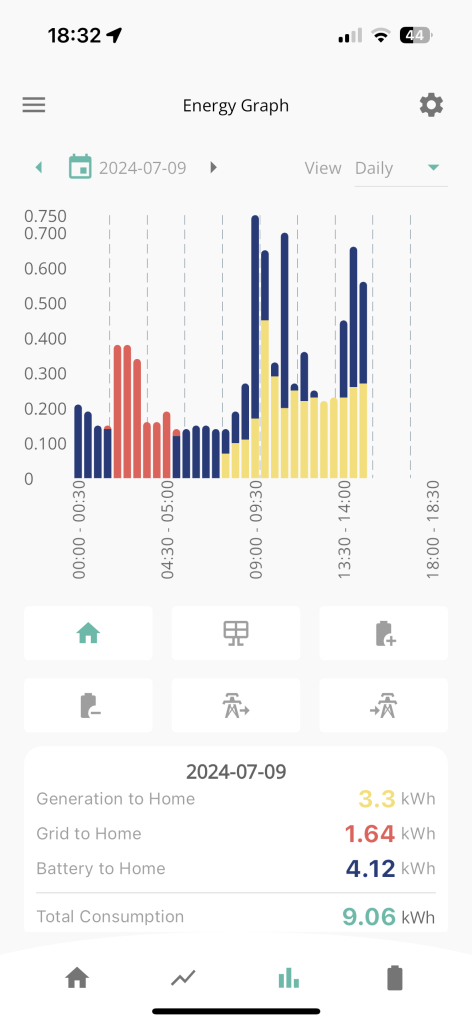
GivEnergy app power consumption screen 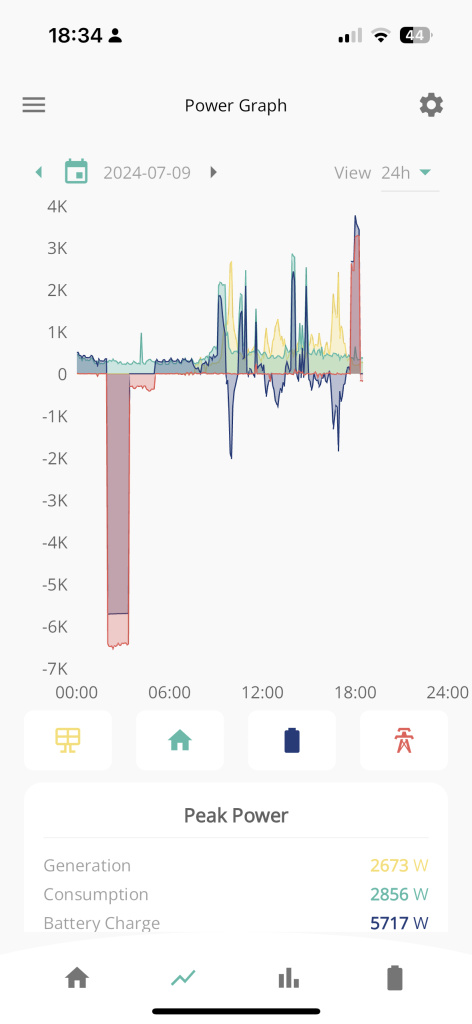
GivEnergy app power graph 
GivEnergy app customising options 
Enphase app solar panel power production 
Enphase app – power production graph 
Octopus app – recording power usage Update – 18th July 2024
In the meeting I mentioned that we were having some outstanding issues in respect of the Tariff we had decided to move on to – this was a move from Octopus Flux (import and export) to Intelligent Octopus Flux. This move just didn’t work for us. We had to give up control of our battery to Octopus and it began to emerge that they were manipulating the settings to maximise operational benefits for themselves. We might have got some small financial benefit over standard tariffs, but not really very significant ones.
We’ve now changed to Agile Octopus for Import and Octopus Fixed (12m) for Export. As we don’t really want to export energy, but maximise the use of our battery, this makes much more sense. The very low Import rates on Agile we can utilise to charge our battery – something which wasn’t happening the way we’d wanted it to on the other tariffs.
So hopefully a closed chapter – I’ll of course update you on any subsequent developments.
-
Google Photos & Snapseed – an update
I’ve posted articles on using Google Photos a few times. Of course with the passage of time, features, and interfaces, change, so it is always useful to just review “what’s occurring”, and see whether there’s anything that needs correcting, or adding to. I will try and go back and edit the posts listed below to reflect changes that I’m aware of.
First and foremost it’s important to note that I don’t tend to use Google Photos for anything other than sharing photos with family and friends, so my use of the editing features is a bit limited. I am however a strong advocate of using Snapseed (available from both the Google Play, and Apple App Store) as a photo editor, but as it works best with the Google Photos app, it’s necessary to install Google Photos as well. [Snapseed is not available as a native desktop app on Windows or MacOS; it’s only available on mobile devices (Android and iOS/iPadOS).] So the first link that’s important to be aware of is this one …
Google Photos and Apple revisited – if you’re an Android user you can skip this article and move to the next paragraph – all your photos taken with your camera will be safely housed in the Google Photos app!!! If you’re an Apple user it’s important to understand how synchronisation works with Google Photos and the Photos app on iOS. If you’re not careful you can either end up with duplicate photos on both platforms, or worse still deleting photos from a device thinking that there’s a copy “in the cloud”.
The next bit of housekeeping is to understand what happens if you want to delete a photo from Google Photos – it’s not entirely straightforward (but it is easier than in the Apple world!!!). This article I wrote – “How do you delete photos from Google Photos?” – attempts to help you delete what you want to delete from your device, or from Google Photos on the web. This is particularly a problem if you’re an Apple user with a Camera Roll, rather than an Android user with Google Photos – so you’d be advised to read it.
So we finally get to editing our photos and using Snapseed. This article – “Snapseed and Google Photos” – is a good overview and will take you quite a way down the road of installing Snapseed, it covers the basics of how to get photos from a camera (rather than a smart phone) into Google Photos, and some basic editing of a photo. There are also links in the article to earlier posts on using Google Photos as well as a video on “getting started” and some additional references that I found useful.
The new stuff!
How To Use Google Photos: The Ultimate Beginner’s Guide [2023] – if you want to just stick with what’s possible for you to do in Google Photos this is just about as good a guide as you’ll get. It goes through all the features of the app, but doesn’t cover editing photos in any detail. If you want a video that covers the same ground, you might like to watch this [I’d like to remind you of the point I made about his reference to Backup and Sync if you’re an Apple user – my earlier comments apply!!! He has decided to use both iCloud and Google Photos on the web for two backups.]. Google’s help guide to editing photos is provided here.
So we turn to Snapseed – here’s a beginner’s video on how to use Snapseed for editing, you should also refer to the article quoted in the earlier post – Complete Guide To Using Snapseed To Edit Your iPhone Photos – from which I also recorded the video from my computer screen, but it’s obviously better using the link from the article. Also please note that although iPhone is mentioned in the title, it’s 100% applicable to Android phones as well. Finally you might probably want to look at this – SNAPSEED: ULTIMATE USER GUIDE + TIPS (2024 UPDATE) – if I’ve convinced you that Snapseed is the “goto” app for photo editing on your smart device.
Google is always updating its apps, and this is particularly true now that we have AI. So a recent update introduces the possibility of background blur – which can make a portrait of a person stand out more, by weakening the effect of the background. Google writes about its new AI features here, and here,
Finally … this article has been all about using Google Photos, which might have let you think that Apple’s Photos app is not so good. In a forthcoming post, I will be examining how Apple Intelligence (available in the autumn) will quite possibly revolutionise Apple’s photo applications, and will for some, if not all, Apple users mean they might be less likely to use Google Photos going forwards. They’ve already moved to allow the sharing of albums stored in iCloud to anyone via a link. That’s progress!!!
-
Apple’s iCloud and Google Photos
A short post to highlight an issue that I wasn’t aware of, and now have to be very wary of. Indeed Ian’s comment about whether you need the Google Photos app installed on your iPhone is prescient – you most probably don’t if you’re backing-up photos to your iCloud account. And if you’re backing-up photos to a google account (as described in the earlier post), there are different ways of doing it which means you quite possibly don’t need the Google Photos app on your phone.
Remember, you can always look at the photos stored in the Google cloud from photos.google.com on your Apple phone or tablet – you don’t need the app installed.
So here goes … another learning point. I’ll type it in capitals so that you don’t miss it!
IF YOU DELETE PHOTOS FROM THE GOOGLE PHOTOS APP ON YOUR IPHONE OR IPAD AND IGNORE THE WARNING – THEY WILL BE DELETED FROM ICLOUD AS WELL.
There, I’ve said it. I didn’t realise it, and always shied away from deleting photos in Google Photos because I didn’t really understand what the warning meant. But now I do and obviously that’s not something I want to do, so how do I go about removing photos from the app, and/or from the Google cloud. Read on!
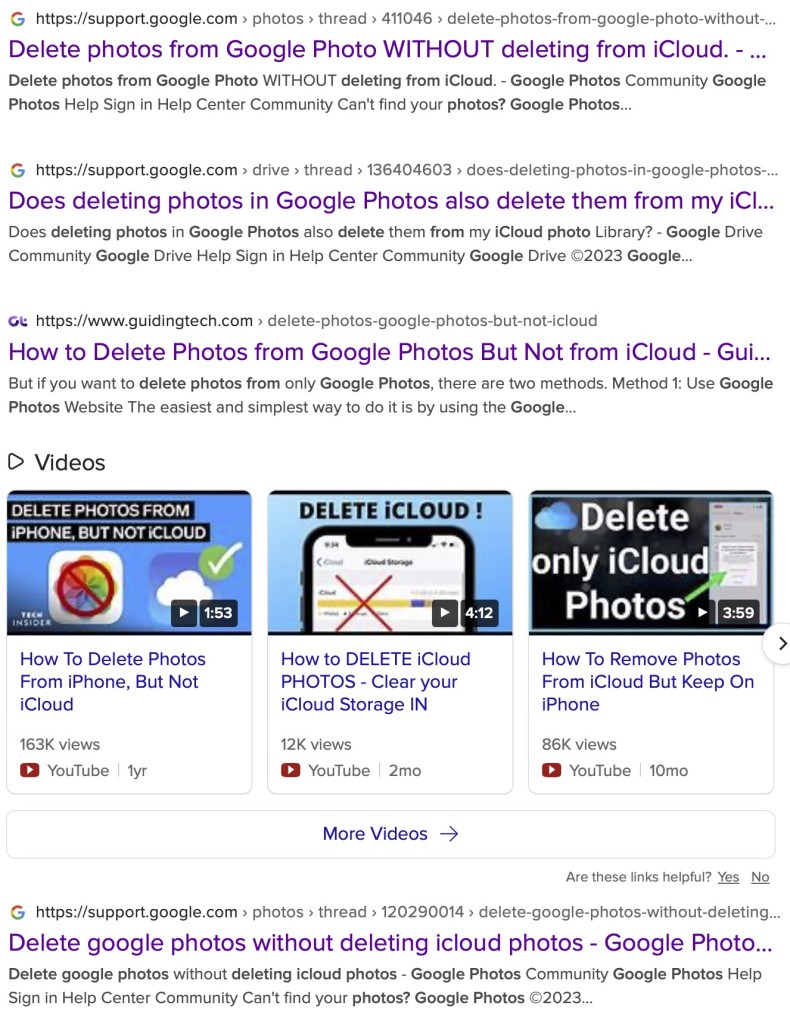
Scary, eh?! Take care when deleting photos from your iPhone What I’ve researched is well summarised in the following article …
How to Delete Photos from Google Photos But Not from iCloud
and a couple of posts on the Google Photos support forum …
Does deleting photos in Google Photos also delete them from my iCloud photo Library?
Google Photos deleted my iCloud Photos library
So what do I take from this?
- If you want to delete photos from Google Photos – do it on the Google Photos website, not in the app on your iPhone or iPad. If you have synchronisation active, they will then be deleted from the app on your device as well.
- If you want to quickly delete all photos from your Google Photos app, just delete the app having first ensured that you’ve switched off Backup and Sync, because if you don’t, when you re-install the app, they will be synchronised back to your iPhone/iPad.
- If you don’t need the Google Photos app, uninstall the app, no photos will be deleted from your phone, they will still be in your Camera Roll and will have been stored on iCloud, nothing will be deleted from the Google Photos website either, so you will have to do that deletion from photos.google.com – see Case 1 above.
- An unlikely scenario, but one to be aware of – If you turn off iCloud before deleting photos from Google Photos on iPhone, then the photo will be removed from your device and Google Photos. It will stay on iCloud. However, if you enable iCloud again on the same phone, the photo will be removed from it too.
- And even more unlikely, but probably unexpected and a potential surprise – Disabling Backup and sync will not have any effect on your iCloud photos as it is just a setting to enable or disable backup service on Google Photos. If you disable it and then delete photos from the Google Photos app on your device, they will be removed from the device as you are technically deleting the device copy on your iPhone/iPad. And once it is deleted, the iCloud copy gets deleted automatically.
Remember. Google Photos in the cloud, and iCloud Photos do NOT work the same way. Apple aims to synchronise all images across all devices with “the master” being held in the cloud. The Google Photos app is just a portal looking into the images on the device, and synchronising (if chosen) those images with ones stored on photos.google.com.
I hope that makes it all perfectly clear 🙂 🙂 🙂
In summary, do not delete photos in Google Photos directly from your iPhone if you have both apps on the device. Use the Google Photos website to remove photos. It is suggested that you should delete a few photos initially. Then, check them in iCloud after some time. If the photos are still there, you can go ahead and delete them in bulk.
-
Snapseed and Google Photos

If you want to edit, even if only in a minor way, the photos on your smart device (phone or tablet, Android or Apple), two offerings from Google should be tried first. If you’re an Android (Google) device user, it’s a no-brainer.
The Google Photos app will be installed on your device when you get it, and all you need to do is install Snapseed from the Google Play store. If you’re an iOS or iPadOS (Apple) device user then there’s a couple of extra steps you need to do before you can get started.
This guide concentrates on Snapseed. I’ve written about Google Photos previously and I’m providing links to them below. I’ll check to see that things haven’t changed materially since I published these posts …
Getting to grips with Google Photos – needs some updating and revising, and links need to be checked.
More Google Photos – some simple image manipulation – basically sound, but I need to check to see if there are any additional tools added.
Sharing an image (or album) from Google Photos – should be just about up-to-date.
How do you delete photos from Google Photos? – more recent so I’m assuming that it’s good-to-go, but I’ll check of course.
Although Snapseed is intended for use on smart mobile devices, you can install it on either a Windows PC or a Mac, but I have no experience of doing this, so it would be a project you would be taking on ahead of me. So for that reason I’m only looking at the app that you can download either from the Google Play, or Apple App stores.
So for camera users (rather than smart phone users), you will first of all need to get the photos onto your device. This could be by a direct cable connection from your camera to your phone, or by transfer using Bluetooth or WiFi, but more likely might be by using a SD-card cable like this one I have for the Apple gear. [It will either have to have a Lightning or a USB-C connector – check first before buying one.]
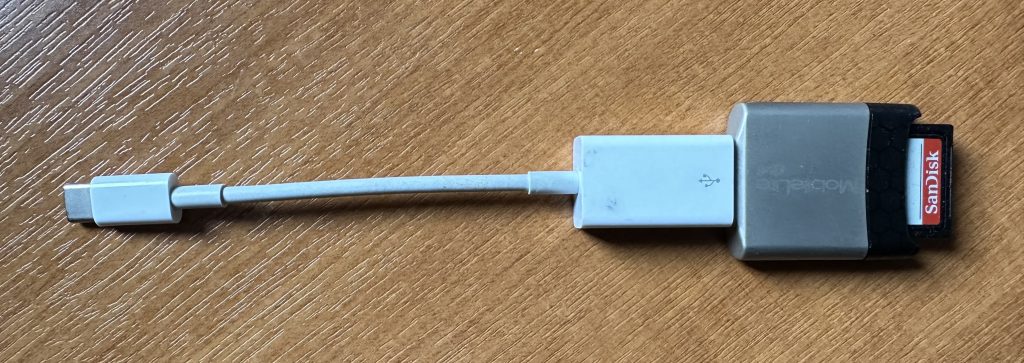
The image(s) thus transferred will be added to your photo library be it Google Photos, or Apple Photos. Another way of adding photos on your computer to your Google Photos would be an Upload to photos.google.com – you will need a Google account to do this. This is how you would do it …

Select Import to Upload images to Google Photos 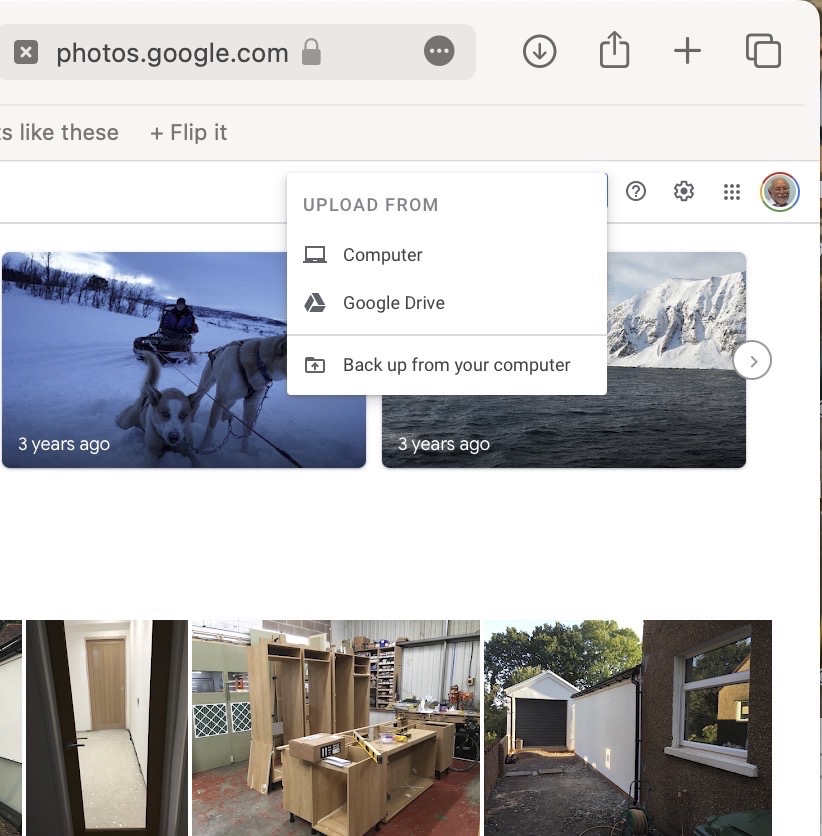
Select images from the Computer (or from Google Drive) You could decide to use Google Backup to synchronise all your photos from your iPhone (or iPad) to Google Photos as an “easy” way of getting the photos on your Apple device into Google Photos, but this is not necessary to use Snapseed as it can access your Apple Photos directly; so I don’t because I’m already backing-up my photos to iCloud. [I only discovered in November I was also sync’ing to Google Photos, so I stopped doing that then and saved some Google Drive storage, and a whole lot of complications about knowing what was where.] But if you want to synchronise from your Apple Camera to Google, this is how you do it from the Google Photos app on your device …

Instructions on how to synchronise Photos on Apple devices to Google Photos You should now install the Snapseed app on your device(s) from the Google Play, or Apple App stores, if you haven’t already. If you’re an Apple user you might choose to install the Google Photos app at the same time – although you don’t need it to use Snapseed, but you might just like to compare how it works.
Next up, if you’re an Apple user you need to allow access to your Photo Library to Snapseed (and optionally Google Photos). This will allow both apps (on iOS) to access the Photos in your Camera Roll on your iPhone or iPad.

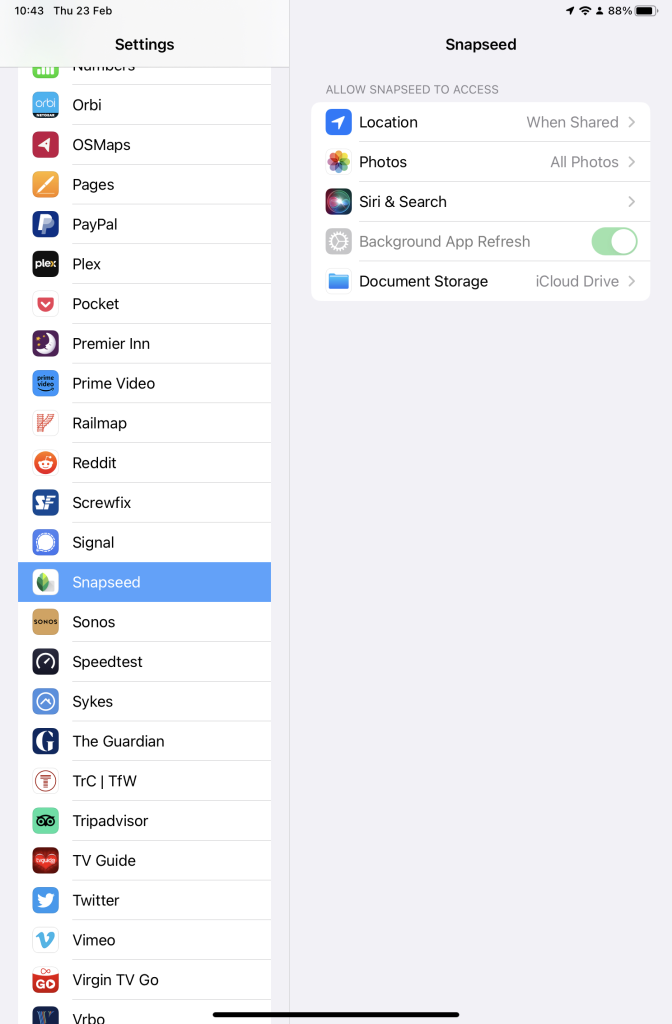
Setting up Google Photos and Snapseed to be able to look at Apple Photos on device(s) So now your ready to start editing. Open the Snapseed app on your device – you are prompted to Open from device (ie look at the images in your Photo Library), or you can access the camera to take a shot, or Open latest image that you’ve taken. The steps from then on are relatively straightforward and you will have selected the image that you want to Use.
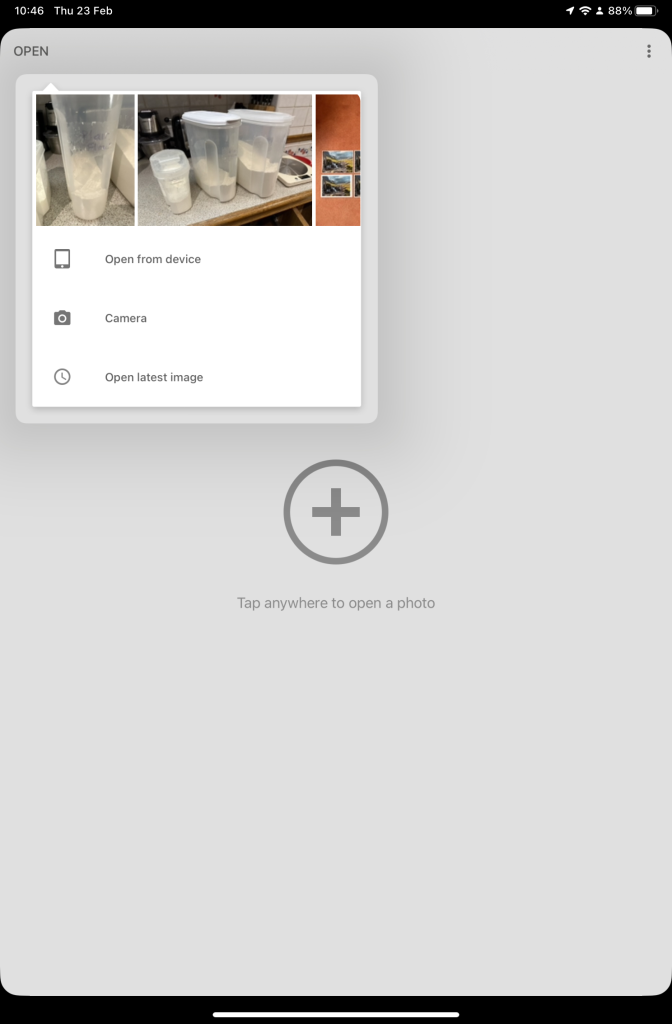
Open Snapseed and look at the photos on your local device 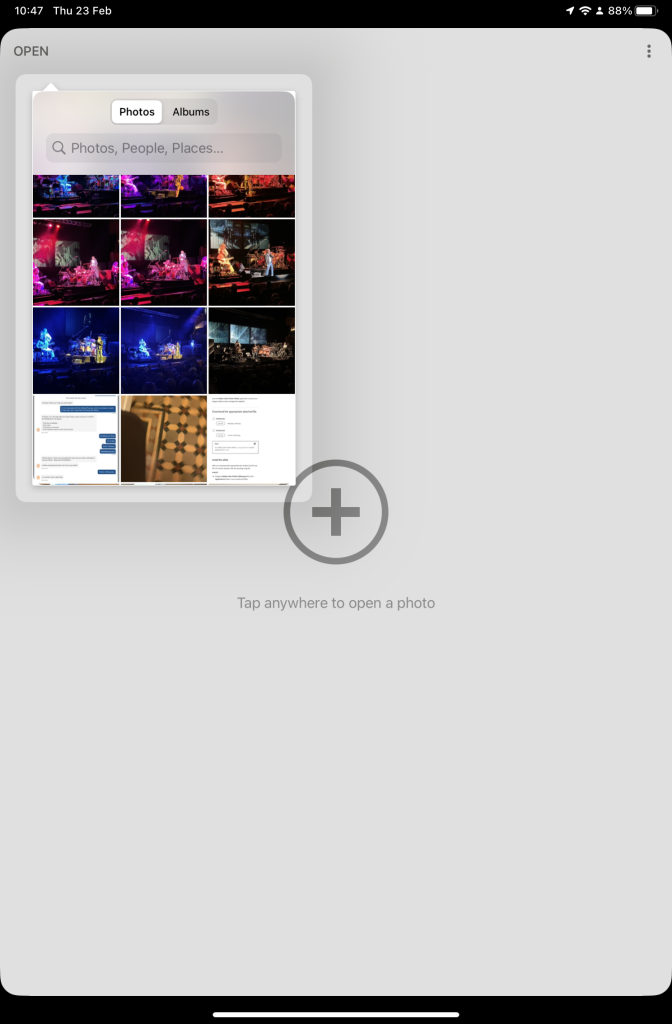
Select an image to edit, and click-on Use 
… and so start editing. That’s about it. This video (recorded from my screen, hence background noise and rather low audio volume) gives a reasonable introduction on how the Snapseed app works …
Here are some links that you might find of interest:
Complete Guide To Using Snapseed To Edit Your iPhone Photos
How to Edit Photos in Snapseed
Using your Android camera to take photos; but I believe all Android phones have slightly different camera interfaces, so you’re better off researching that for yourself. [NB If you have come across a really good guide, let me know and I’ll add it to the list here.]
How to Use the Camera on an Android Phone: The Basics Explained
Then for the iPhone …
How to use iPhone Camera: A guide for beginners and pros
A Beginners Guide To Incredible iPhone Photography
How To Use The iPhone Camera App To Take Incredible Photos
I hope that helps. Please advise if you come across something that doesn’t quite work for you, it might be my notes!!!
-
Getting photos to the cloud(s) and back
This article is prompted by a combination of a casual enquiry about sending photos from your iPhone to Google Photos (hosted on a Google Drive), and my own discovery that I was backing-up iPhone photos to BOTH iCloud and Google Photos.
Observation one. Google Photos and iCloud Photos don’t work in quite the same way. Whereas you can access the Photos you may have stored on Apple’s iCloud storage from icloud.com through the iCloud Photos app, you cannot access Google Photos from drive.google.com directly – you have to go to photos.google.com to access them. Google Photos uses up some of your Google Drive storage – you get 15Gb “for free” with a Google account – but it’s a standalone application, in the same way as Google Mail is. It’s an important distinction. Google provides you with applications which make use of their cloud storage, Apple provides cloud storage alongside access to applications which use that storage and which synchronises back to devices.

The iCloud window {Access to all Apple applications and cloud storage} 
The Google Drive window {NB No access to Photos, or Mail} 
The Google Photos window {separate from Google Drive} Observation Two. This article concentrates principally on Google and Apple, because they are the two principal players in the Camera and Cloud Storage space. There are other cloud storage solutions on which you can store photos, eg Microsoft’s OneDrive, and Dropbox. I will only refer to these briefly at the end of this article. There are undoubtedly other cloud storage solutions, but I won’t be writing about them.
Observation Three. Anything I write about the link between Camera and Photos on an Android/Google system is second-hand knowledge, and I cannot verify it!
Observation Four – the final one. This article does not seek to cover the general topic of transferring photos from a phone to your computer. This is more than adequately covered in this article. I suggest you read it too.
Not wishing to be dismissive, but just because it’s so straightforward – I’m going to discuss Google Photos first. If you have an Android phone and thereby have a Google account, you automatically have 15Gb of cloud storage and the two are linked, and by default any photos you take on your phone are backed-up to your Google account. This is described well in the Google Support article. A couple of things are worth highlighting however: a) you can switch-off automatic back-up and synchronisation of your photos, in which case all backups would need to be done manually; b) you should carefully choose the “quality” of the photos you back-up – they may not be the same as that of the photo on your device; and c) it would appear that you could backup photos to a different account from your main one, thus adding to the free 15Gb you get with each account. [Alternatively, for £15.99 a year you could get an additional 100Gb of storage from Google. If you aren’t an Apple user this is definitely worth considering.]
It’s not that much more difficult if you want to save photos from your iOS (iPhone or iPad) device to the Google cloud storage. Again the Google Support article describes the process and the options quite well.
Similarly if you’ve transferred photos to your computer (eg from a camera SD-card), then Google’s got you covered to back-up and sync to their Cloud storage in this article. You should nominate a folder on your computer that Google Drive will monitor for newly added files which will then be backed-up and synced to either Google Drive, or to Google Photos, or both, depending upon the option(s) you’ve chosen.
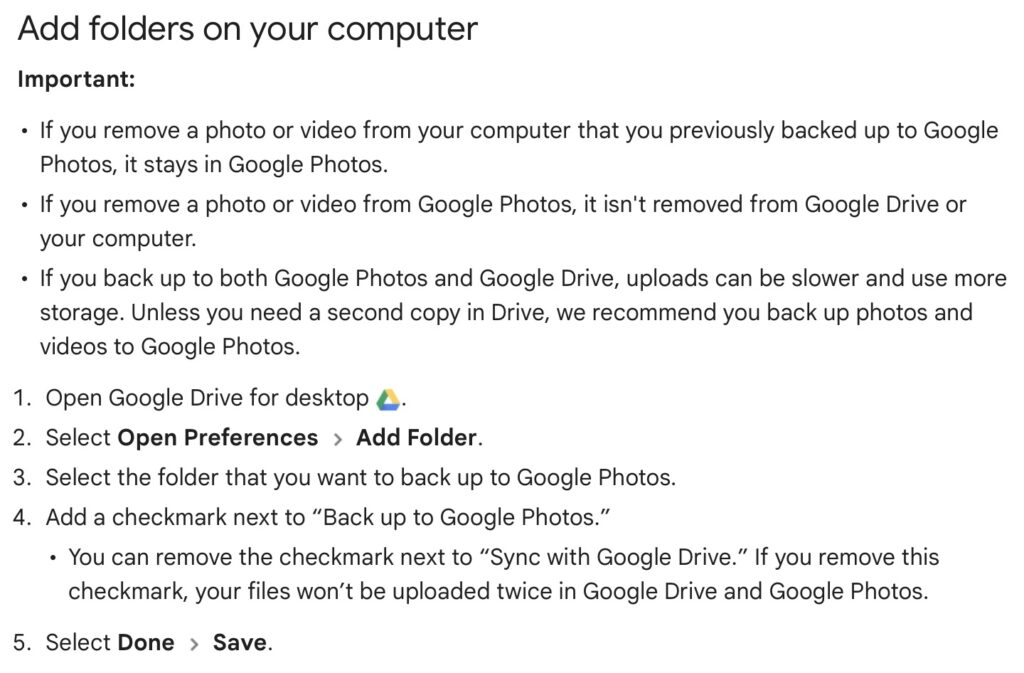
Note (4) – you might get two copies if you don’t uncheck “Sync with Google Drive” For this to work however, you do need to be sure you’ve a) installed the Google Drive on your computer, and b) you’ve set the preferences the way you want them. In my case, since I’ve increased the amount of Google storage I have, I’ve chosen to Mirror a folder (in itself called Google Drive) – then both the folder on the computer, and the one in the cloud should be exactly the same. A mirror in fact. Anything I add to (or edit on) my local Google Drive will be copied to my Google Drive in the cloud.

So we turn next to the Apple ecosystem. [I should feel more confident here, but as you may have noted that I disclosed at the start of this article that I was doing something extremely stupid and not noticing my idiocy.] Here the support page on Apple Photos and iCloud I think really does a good job of explaining your choices and how to set up backup to their cloud storage. I don’t think I can improve on it. But what if you’ve got Google Photos installed as well on your iOS device? This is where I made my foolish mistake. I enabled Backup and Sync on my iPhone and so I got TWO copies of every photo – one in my Google storage in Google Photos and the other in my iCloud storage. Duh!!!
Disabling the Backup and Sync left me with an image which was shared locally between the Google Photos and Apple Photos apps. How could I get that image (or group of images) onto Google Photos to perhaps share with friends or family?
It turns out that there are two reasonably easy ways of doing this. By enabling iCloud Photos on the phone (or tablet) …

Set iCloud Photos to On … I can then download from iCloud to a folder on my computer which I can then upload to Google Photos from. Really rather simple and not a use case for Google Photos Backup and Sync to be employed.
Alternatively, I could go into the Google Photos app, select the image I want to send to Google Photos in the cloud and Share it by getting a link and then sending myself a message. The act of sharing it copies the image to the cloud, from which I can then add it albums, etc.
Using either of these approaches allows you then to obtain a link for the album which you can then Share to a list of users, or obtain a link for public sharing.
Once you get the photos onto Google Photos the fun starts. It’s not intuitive what happens when you decide you want to delete them either from the cloud, or from your device. In fact it’s downright confusing. I’ve written about this in another place (the public Thought grazing) and life is too short to repeat anything on here that I’ve already written over there, and believe still to be correct. Best of luck!!!
The situation with deleting photos from Apple Photos and iCloud Photos is slightly more straightforward and I’ve written this up already, so won’t repeat it.
It goes without saying that keeping it all in the Apple ecosystem (for me) makes a lot of sense, and with the ability to share albums on the way – it’s not yet as sophisticated as the Google Photo Albums service – I may transition away from Google Photos altogether in time.
If you’re a PC Windows user with an iPhone, then a solution is beginning to appear that enables you to use the Windows Photo application with iCloud. You can install iCloud for Windows on your PC and then you should be able to manage your iPhone photos from your desktop.
For Dropbox users, you can setup an automatic upload of photos to the service. They even give you a bit more free storage if you enable this, or at least they used to!