
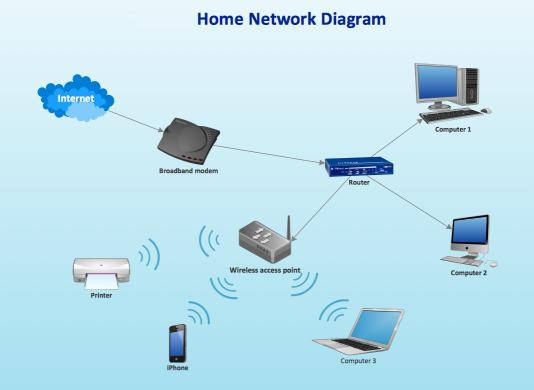
This short note is written to advise on possible performance improvements you can employ if you feel that your network is “slowing down”. It may be that you just feel files, or pages, are taking longer to download, or display; or it may be that you feel it’s taking “too long” to connect to the remote site from your browser.
The first case can often be resolved by moving your WiFi router, if possible, to a better location. Remember that although WiFi can appear to go through walls and ceilings, the more you expect it to do, the worse will be the signal. So move the WiFi router and perhaps you’ll get a better signal. This is often not possible, so the next thing to consider is to use one of the ethernet ports on the back of the router and connect the computer to the router by ethernet cable, rather than using WiFi. This will always provide better network performance. This may not always be convenient so the last solution is to “extend” your network using either a WiFi extender, or a different approach called Powerline. This article explains the difference between the two and also includes a commentary on ethernet cable as well.
If you opt for Powerline, you will plug a unit into a 13amp socket near to your router and connect it with an ethernet cable to the router, and then on the same electric circuit (ring main) plug in another box which can be just another ethernet socket, or more likely it will have a WiFi capability. Systems from Trendnet, TP-Link, D-Link and others are amongst those you could purchase. Here’s a review of possible systems, most of which can be purchased from Amazon. It is possible to configure these to use the same SSID as your router, but you may have to make do with having a separate network when you connect to these points.
Alternatively, your ISP will often have a solution that will mean that you can use the same SSID for the extended WiFi access points, or you can purchase WiFi extenders (as described above) from Amazon which you can then configure to use the same SSID as your router. So that’s the first case taken care of. What if you just feel that your network is lazy, is there anything you can try to improve performance.
Well first – and perhaps you should have done this first anyway – you should check whether your ISP is delivering something near to the broadband speed it’s contracted to provide. We’ve talked about this before but test your internet speed using something like Speedtest. [As an aside, you can also download the Speednet app for your mobile device and walk round the house testing your signal this way too.] If that’s not the problem, and it just seems to take too long to make connections, then perhaps you should apply some new configurations to your router.
The first thing you can do is to see if you and your neighbours are battling to use the same wireless channels. The common ones used are 1, 6 and 11 as they don’t overlap. However for this reason, sometimes, routers might be “hard-wired” to use one of these channels and so two nearby networks might actually be using the same channel which could then be interfering with each other. Read this article to learn more about this, and then once you’ve tested your network and it looks as though you could be suffering this way, you’ll need to refer to your router manual (or talk to your ISP) to change the channel(s) you use. Why channels? Well because most routers now broadcast signals at two wavelengths – 2.4Ghz and 5Ghz. What’s the difference – read this article.
The other thing you can do is look at how your router is setup with its DNS server. Your ISP will have configured your router to use their DNS servers, but it might be that these are not the best ones for your locality – especially if you’re on a laptop and are moving about a bit! So what is a DNS server, and what does it do, and why might this be important?
A DNS server translates a URL (such as https://digital.cardiffu3a.org.uk/) into a sequence of numbers – an IP address – that instructs the modem that transmits and receives data going and coming from the internet where to go. This whole process is explained in some detail in this article. If you decide to change the DNS settings on your router, or just on a device, you can look at this article which shows you how to do it.
In my case, I’d been disappointed in the performance of my new Netgear Orbi routers which although they seemed to shovel the data around very fast, there was a noticeable lag/delay in achieving connections, and I’d also felt that the router was dropping connections more than it should. So, bearing in mind I have a Virgin Media Superhub that’s only running in modem mode with the Netgear Orbi router behind it, I changed the configuration of the router which was pointing at VirginMedia’s DNS servers to point at Google’s secondary DNS server. I also checked what channels were being used by nearby WiFi networks using the Mac’s Wireless Diagnostics tool described in this article …
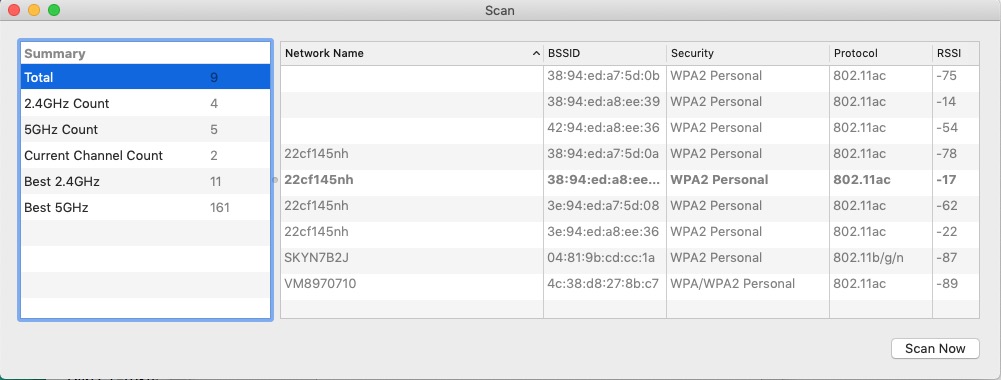
… which indicated that I should change the 2.4Ghz channel that was being used from 1 to 11, and to set my 5Ghz channel to 161.
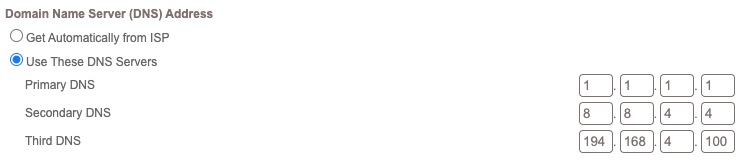
I left the DNS server setting on my devices to be ‘automatic’. This makes it much easier to “roam” away from the house with a mobile device. I then ran a test called namebench (from Google) to try and find the best DNS server for my home network, but you don’t need to do this. I would suggest you look at this article and then experiment with Cloudflare, Google, and OpenDNS perhaps in that order until you get a response to your internet request that satisfies you. Leave your ISPs DNS server in the list of servers (the third in the list below) – just-in-case.

 internet) enters your house. If you’re lucky you will have a fibre-optic connection which would give you the fastest speed and performance but the fibre only runs from the Exchange to a Street cabinet. From the cabinet to your house the connection will be by copper. You can
 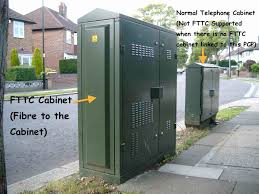 recognise whether you have fibre in your area by looking at the BT street cabinets. If they’re like the one on the left – you have. If they’re smaller like the one on the right of this picture and don’t have vents in them (necessary for cooling) – then you won’t … yet! Inside the cabinet it is still likely that there will be a tidy arrangement

