Did you know … you can create a shortcut to Thought grazing on an iPhone (probably similar on an Android phone) by pressing the Share button when you’re on a page you want to have a quick link to; and then selecting Add to Home Screen and possibly editing the suggested name; then moving it to where you can easily find it on your phone Home screen. You can setup any number of shortcuts this way to any website you frequently use.
A short post to highlight an issue that I wasn’t aware of, and now have to be very wary of. Indeed Ian’s comment about whether you need the Google Photos app installed on your iPhone is prescient – you most probably don’t if you’re backing-up photos to your iCloud account. And if you’re backing-up photos to a google account (as described in the earlier post), there are different ways of doing it which means you quite possibly don’t need the Google Photos app on your phone.
Remember, you can always look at the photos stored in the Google cloud from photos.google.com on your Apple phone or tablet – you don’t need the app installed.
So here goes … another learning point. I’ll type it in capitals so that you don’t miss it!
IF YOU DELETE PHOTOS FROM THE GOOGLE PHOTOS APP ON YOUR IPHONE OR IPAD AND IGNORE THE WARNING – THEY WILL BE DELETED FROM ICLOUD AS WELL.
There, I’ve said it. I didn’t realise it, and always shied away from deleting photos in Google Photos because I didn’t really understand what the warning meant. But now I do and obviously that’s not something I want to do, so how do I go about removing photos from the app, and/or from the Google cloud. Read on!
Scary, eh?! Take care when deleting photos from your iPhone
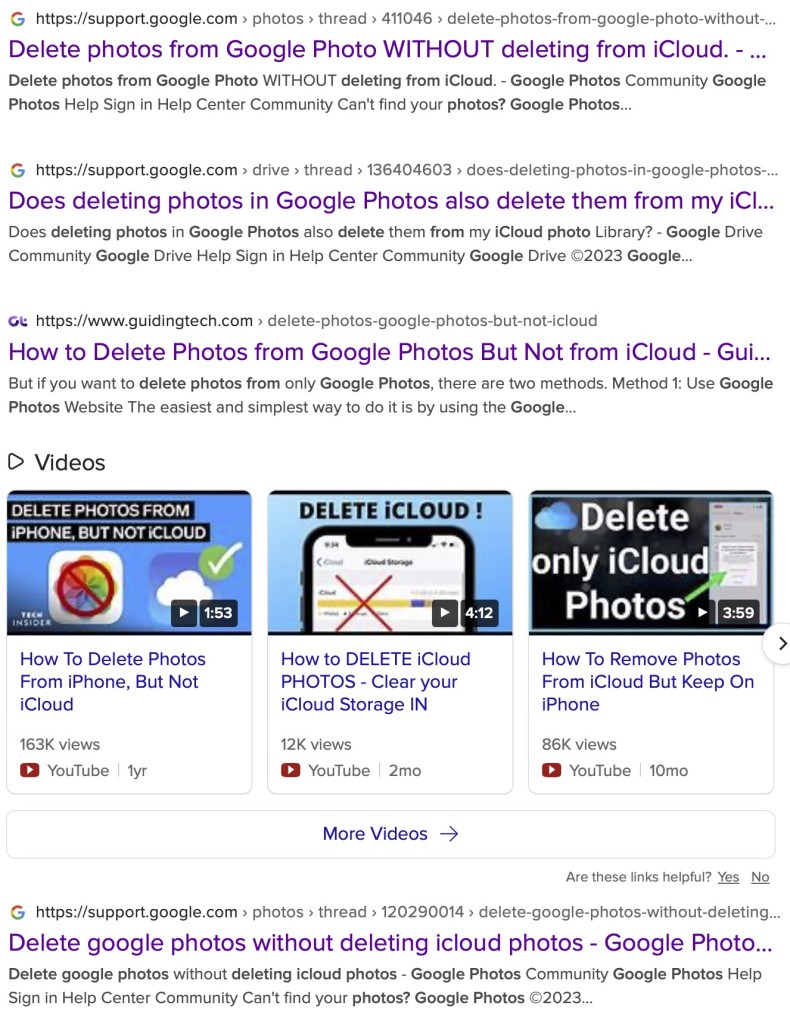
What I’ve researched is well summarised in the following article …
If you want to delete photos from Google Photos – do it on the Google Photos website, not in the app on your iPhone or iPad. If you have synchronisation active, they will then be deleted from the app on your device as well.
If you want to quickly delete all photos from your Google Photos app, just delete the app having first ensured that you’ve switched off Backup and Sync, because if you don’t, when you re-install the app, they will be synchronised back to your iPhone/iPad.
If you don’t need the Google Photos app, uninstall the app, no photos will be deleted from your phone, they will still be in your Camera Roll and will have been stored on iCloud, nothing will be deleted from the Google Photos website either, so you will have to do that deletion from photos.google.com – see Case 1 above.
An unlikely scenario, but one to be aware of – If you turn off iCloud before deleting photos from Google Photos on iPhone, then the photo will be removed from your device and Google Photos. It will stay on iCloud. However, if you enable iCloud again on the same phone, the photo will be removed from it too.
And even more unlikely, but probably unexpected and a potential surprise – Disabling Backup and sync will not have any effect on your iCloud photos as it is just a setting to enable or disable backup service on Google Photos. If you disable it and then delete photos from the Google Photos app on your device, they will be removed from the device as you are technically deleting the device copy on your iPhone/iPad. And once it is deleted, the iCloud copy gets deleted automatically.
Remember. Google Photos in the cloud, and iCloud Photos do NOT work the same way. Apple aims to synchronise all images across all devices with “the master” being held in the cloud. The Google Photos app is just a portal looking into the images on the device, and synchronising (if chosen) those images with ones stored on photos.google.com.
I hope that makes it all perfectly clear 🙂 🙂 🙂
In summary, do not delete photos in Google Photos directly from your iPhone if you have both apps on the device. Use the Google Photos website to remove photos. It is suggested that you should delete a few photos initially. Then, check them in iCloud after some time. If the photos are still there, you can go ahead and delete them in bulk.
A piece of software that sits on your device and hides your IP address and user credentials from “snooping” network users. Of particular value when connecting to an unsecured public network (eg a cafe). Normally unnecessary on a home network when connecting to you router, but it obviously can provide additional security and hides your device completely from the internet.
One additional use that they have is that because you can choose the geographical location of the VPN server you wish to connect through, you can logically (or virtually) place yourself in a different country, thus enabling you to appear to be in the UK – when abroad (so that you can watch UK TV); or alternatively appear to be in a different country from home (when assessing alternative cost options for say a holiday).
— Forum Responses —
Thanks for this, I am looking at NordVPN for location shifting.
If I sign up can I use it on 2 Android phones, W10 Computer, and Android Tablet, all on one subscription ?
How I get web pages that don’t print into a format where they will:
Use the ‘snipping tool’ in Windows, select and paste it into Word or PowerPoint or something similar, and print.
On a similar vein, if I want to copy some text and the web page is set not to allow copying of text, I use the snipping tool, select and same as a jpeg, then use the OCR reader https://www.newocr.com/ to convert the picture into text and copy into the document I want it to be in.
If you want to edit, even if only in a minor way, the photos on your smart device (phone or tablet, Android or Apple), two offerings from Google should be tried first. If you’re an Android (Google) device user, it’s a no-brainer.
The Google Photos app will be installed on your device when you get it, and all you need to do is install Snapseed from the Google Play store. If you’re an iOS or iPadOS (Apple) device user then there’s a couple of extra steps you need to do before you can get started.
This guide concentrates on Snapseed. I’ve written about Google Photos previously and I’m providing links to them below. I’ll check to see that things haven’t changed materially since I published these posts …
Although Snapseed is intended for use on smart mobile devices, you can install it on either a Windows PC or a Mac, but I have no experience of doing this, so it would be a project you would be taking on ahead of me. So for that reason I’m only looking at the app that you can download either from the Google Play, or Apple App stores.
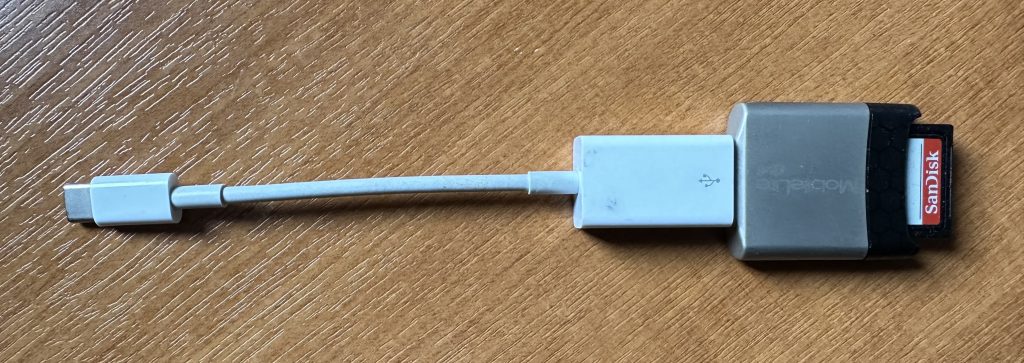
So for camera users (rather than smart phone users), you will first of all need to get the photos onto your device. This could be by a direct cable connection from your camera to your phone, or by transfer using Bluetooth or WiFi, but more likely might be by using a SD-card cable like this one I have for the Apple gear. [It will either have to have a Lightning or a USB-C connector – check first before buying one.]
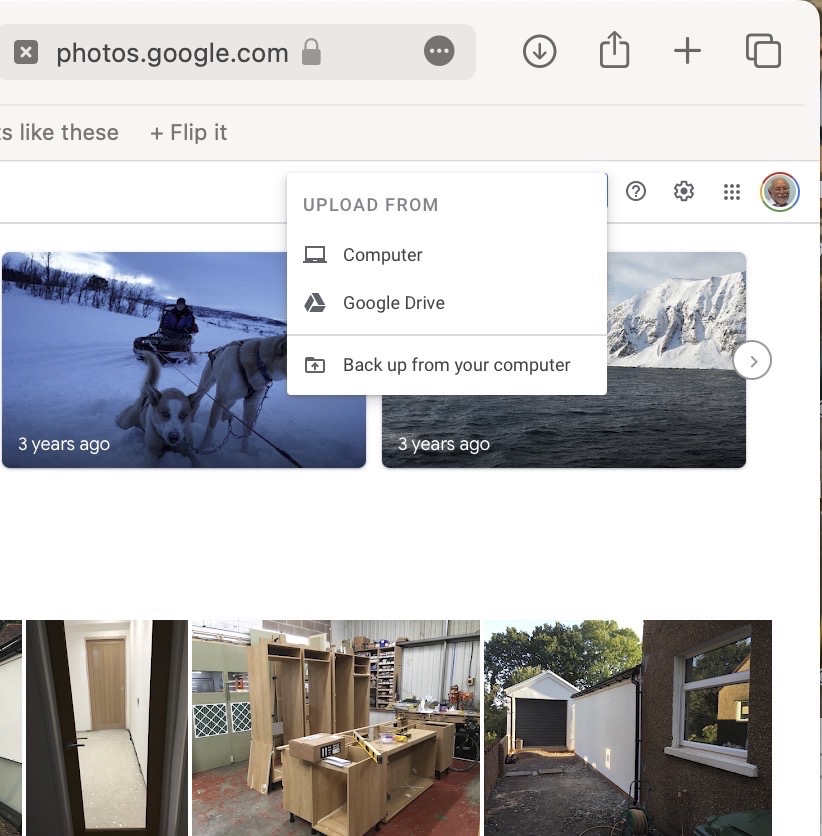
The image(s) thus transferred will be added to your photo library be it Google Photos, or Apple Photos. Another way of adding photos on your computer to your Google Photos would be an Upload to photos.google.com – you will need a Google account to do this. This is how you would do it …
Select Import to Upload images to Google PhotosSelect images from the Computer (or from Google Drive)
You could decide to use Google Backup to synchronise all your photos from your iPhone (or iPad) to Google Photos as an “easy” way of getting the photos on your Apple device into Google Photos, but this is not necessary to use Snapseed as it can access your Apple Photos directly; so I don’t because I’m already backing-up my photos to iCloud. [I only discovered in November I was also sync’ing to Google Photos, so I stopped doing that then and saved some Google Drive storage, and a whole lot of complications about knowing what was where.] But if you want to synchronise from your Apple Camera to Google, this is how you do it from the Google Photos app on your device …
Instructions on how to synchronise Photos on Apple devices to Google Photos
You should now install the Snapseed app on your device(s) from the Google Play, or Apple App stores, if you haven’t already. If you’re an Apple user you might choose to install the Google Photos app at the same time – although you don’t need it to use Snapseed, but you might just like to compare how it works.
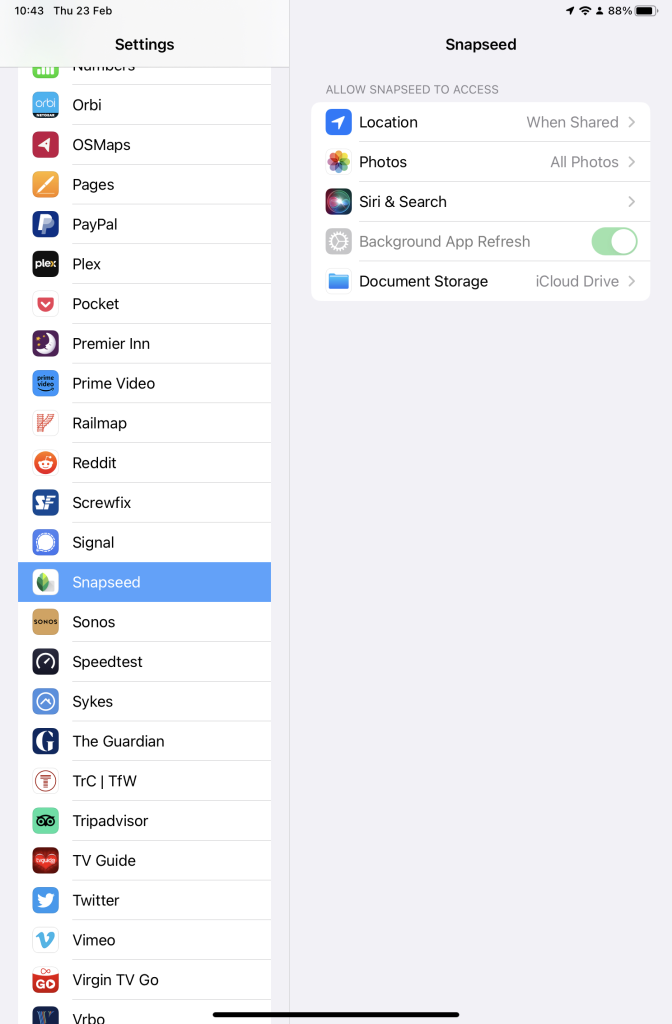
Next up, if you’re an Apple user you need to allow access to your Photo Library to Snapseed (and optionally Google Photos). This will allow both apps (on iOS) to access the Photos in your Camera Roll on your iPhone or iPad.
Setting up Google Photos and Snapseed to be able to look at Apple Photos on device(s)
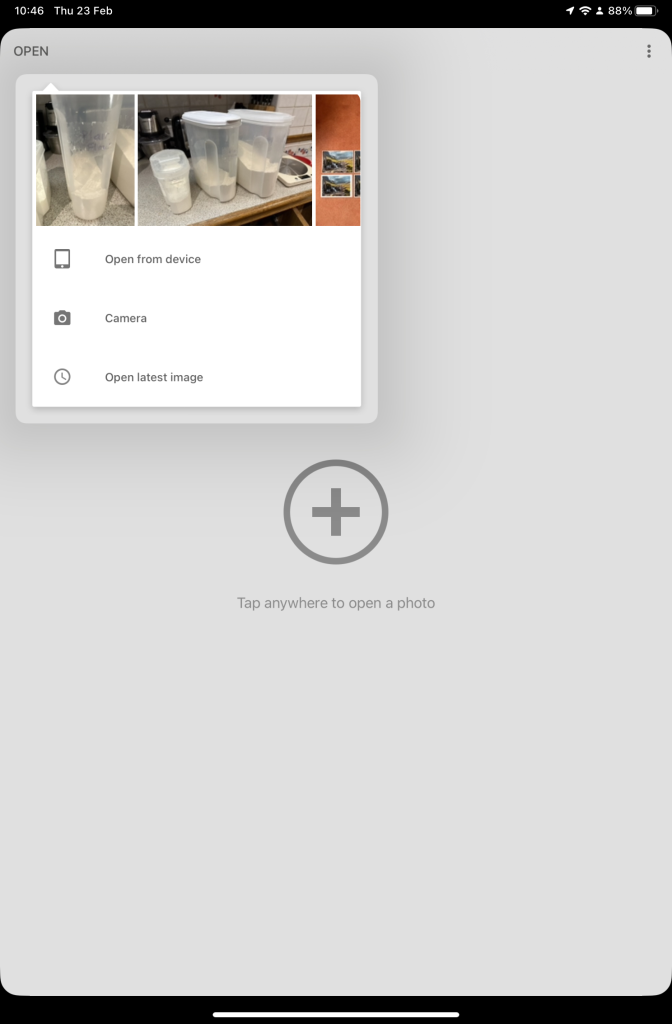
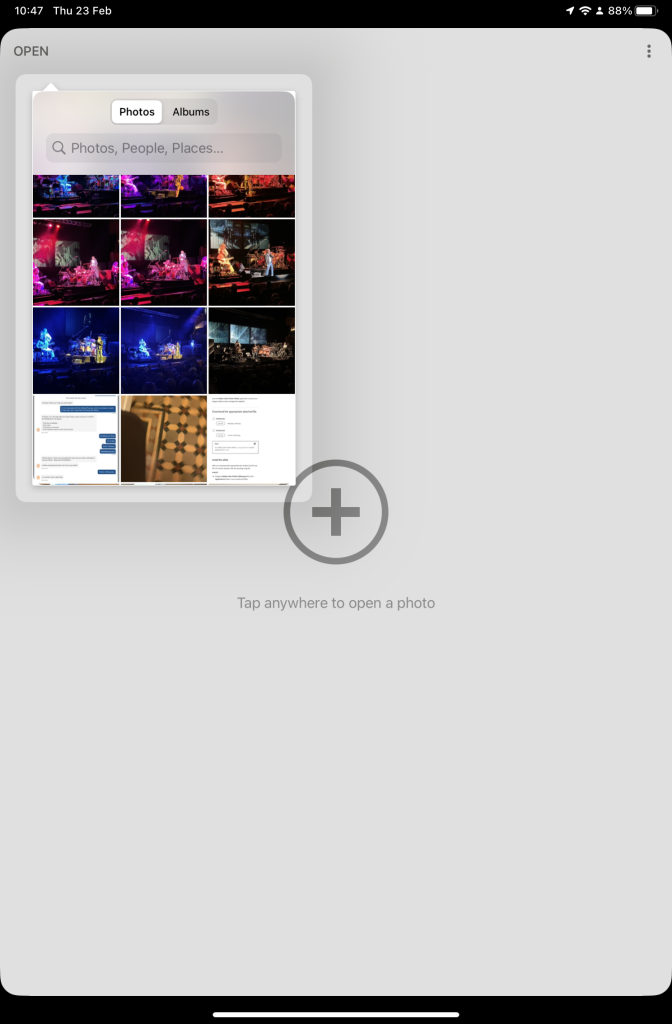
So now your ready to start editing. Open the Snapseed app on your device – you are prompted to Open from device (ie look at the images in your Photo Library), or you can access the camera to take a shot, or Open latest image that you’ve taken. The steps from then on are relatively straightforward and you will have selected the image that you want to Use.
Open Snapseed and look at the photos on your local deviceSelect an image to edit, and click-on Use… and so start editing.
That’s about it. This video (recorded from my screen, hence background noise and rather low audio volume) gives a reasonable introduction on how the Snapseed app works …
Here are some links that you might find of interest:
Using your Android camera to take photos; but I believe all Android phones have slightly different camera interfaces, so you’re better off researching that for yourself. [NB If you have come across a really good guide, let me know and I’ll add it to the list here.]
[Revised 17th January 2023 and February 22nd 2024]
Now there’s a question. Once upon a time it was a little easier to answer. You connected your computer with a piece of wire to a socket in the wall and beyond the wall was ??
So perhaps it’s never been easy to answer that question. It’s not magic, it’s not fluffy, it’s actually really complicated technology which works in a relatively simple way to make things relatively easy for us to use it. Let’s start with a few videos …
How does the internet work? – This [updated] BBC Bitesize page (produced for children) is a really good starting point to help you understand how the internet works and introduces some of the terminology (ie protocols, packets) that will be useful to you to understand the other videos.
How the Internet Works in 5 Minutes – the internet is not a fuzzy cloud. The internet is in effect a wire (or a fibre-optic cable), actually buried in the ground or carried as wires between posts. Computers connected directly to the internet are called Servers, while the computers you and I use are clients, because they are not connected directly to the internet, but through an Internet Service Provider. Mobile devices away from the home, connect to the internet using radio-waves to connect to cell-towers with increasing capacity being generated by increasing the frequency modulation of the waves (ie 3G, 4G, 5G and even 6G). Mobile devices in the home or in the office, or in public hot-spot spaces, use WiFi to connect to the internet using two frequencies – 2.4GHz and 6GHz. All of these require Routers to shuttle packets of information across the internet, and transmit e-mail, pictures, and web pages. Although this video is a little dated, it really does explain the process of what happens when you connect to the internet …
A more recent video and the ones that are referenced at the end of the video will get you a long way to understanding the technology that makes up the Internet.
How Does the Internet Actually Work? – this discusses how internet traffic can be labelled to ensure that packets of data can arrive at their destination with the minimum amount of disruption [- but it is a biased view in favour of scheduling]. However for an impartial point of view of Net neutrality, you should probably look at this video produced by Vimeo – strong supporters of Net Neutrality …
Finally a couple of alternative views of the internet. First, Andrew Blum (in a TED Global talk) philosophically examines What is the Internet, really? A journey that started for him when he found out a squirrel had chewed through a cable led to him exploring trans-ocean cables and the very physical nature of the internet – a wire! Then this rather entertaining video …
… takes us from very local internet and cell-phone technology, through an examination of data centres such as the former Western Union office at 60 Hudson in Manhattan, to laying ocean cables and the future with balloons acting as transmitting stations for low-density inhabitation, or remote areas.
You might also be interested in seeing a Google Data Centre, in particular the pieces on security and cooling are interesting. [However, all of this increasing use of the internet comes at a cost to our environment as the advance of Artificial Intelligence and its huge need for energy for increased computing power comes at a cost.]